CircleCI vs. GitHub Actions: Which is Better?
Which tool is best for those starting out on their DevOps journey? Check out our detailed deep dive.
There are many companies working to simplify life for developers in the cloud. (We're one of them!) In particular, we've seen in recent years a proliferation of Continuous Integration and Continuous Deployment (CI/CD) solutions aimed at making it easier to package and deploy applications in the cloud.
Two such solutions are GitHub Actions and CircleCI. In this article, I take a look at how the two services compare by stepping through performing a common CI/CD task in each.
GitHub Actions
With so many companies using GitHub, it only makes sense for the service to support its own integrated CI/CD workflow. GitHub Actions enable building, testing, and deploying code across a wide variety of platforms and hosting services.
Using GitHub Actions, you can define a workflow that performs a set of actions, a reusable extension that performs a specific task. You define actions as steps and group them into jobs. The entire workflow is executed in response to some event - e.g., a check-in to a branch on your repository.
For example, you could define a continuous integration workflow in GitHub Actions that builds a project and runs a series of tests on it. (GitHub Actions provides native build and test support for Java, .NET, Ruby, Swift, Powershell, Node.js, Python, and Xamarin.) You could then define a connected workflow that deploys the resulting product to an artifact repository or directly onto a cloud provider such as AWS.
GitHub provides a large number of default actions. It also provides a robust extensibility API through which you can define your own custom actions either in a Docker container or via JavaScript.
Getting Started with GitHub Actions
To test out GitHub Actions (and CircleCI), I set myself a simple task: upload a new version of a Docker container from a project in one of my GitHub repos to Amazon Web Service's Elastic Container Service. (If you're unfamiliar with containers, check out our tutorial on getting started with Docker.)
I went to my repo, db-test-2, and clicked the Actions tab. From there, I clicked New workflow. The New Workflow page gave me a large list of options. I scrolled down to Deployment and clicked Deploy to Amazon ECS.
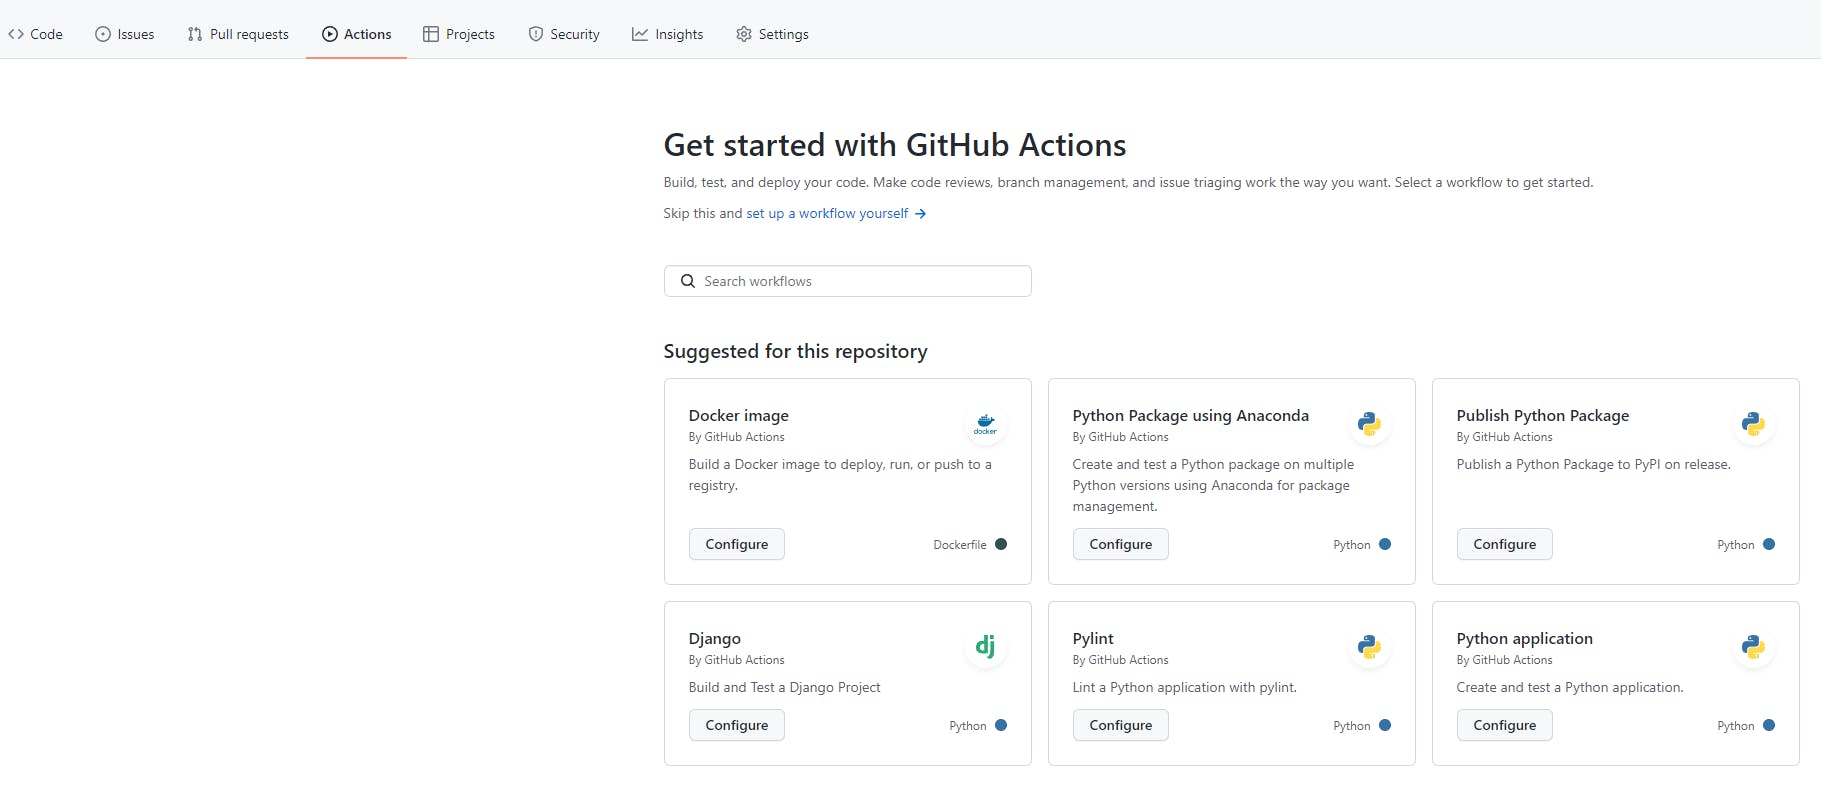
To create a workflow, you need to create a YAML file using a syntax defined by GitHub Actions. After you are finished editing the file, you commit it to your repository, where you can change and enhance it at any time.
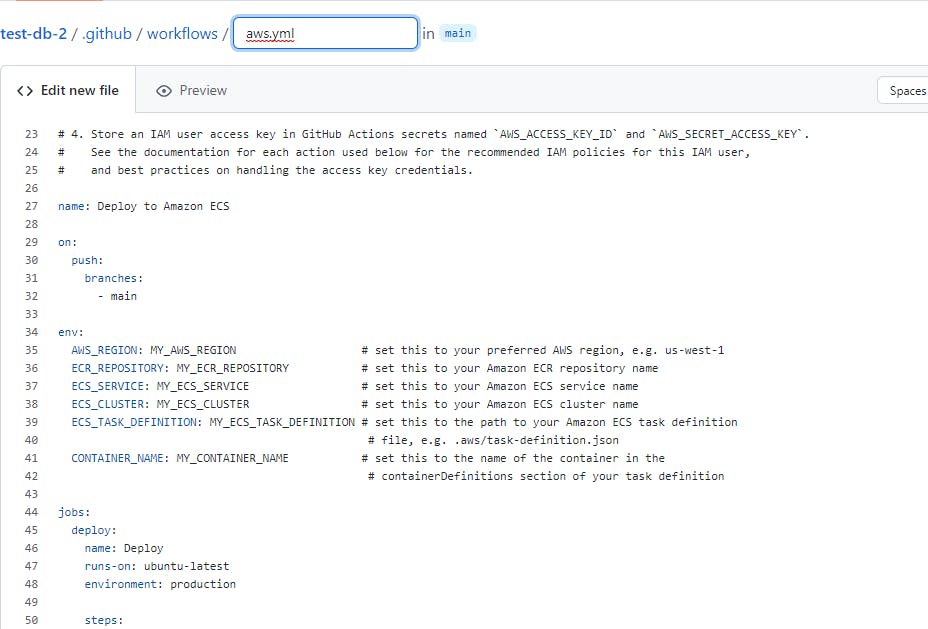
Unfortunately, I realized that, while this GitHub Action will automate pushing your built container to ECS, it won't perform any other infrastructure automation on your behalf. To get this to work, you need to pre-create the following resources in your AWS account:
- An Elastic Container Repository (ECR) repo to hold your container
- An ECS cluster to run your container on
- An ECS task definition that defines memory, CPU, and other parameters for your container
- An ECS service that specifies how many instances of your container to run and how to load-balance traffic
I won't go into depth on how to configure these resources. A great resource (and the one I used for this article) is Francesco Ciulla's article on making your Docker container production-ready with ECR and ECS.
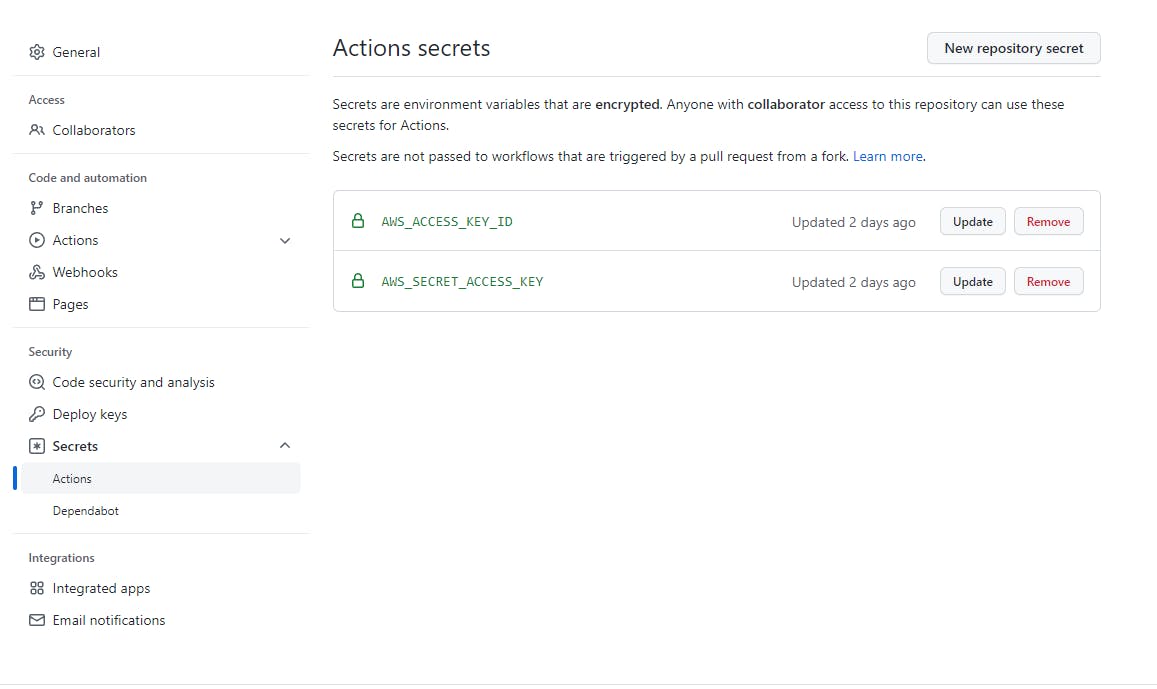
In addition to this, you'll need to tell GitHub how to access your AWS account. You do this by adding an AWS client access key and client secret to GitHub Secrets. You can add secrets by navigating to your GitHub account settings and then clicking Secrets -> Actions. For our GitHub Actions Docker to ECS deployment, our Actions script expects the variables to be named AWS_ACCESS_KEY_ID and AWS_SECRET_ACCESS_KEY.
But wait - you're still not done! You still need to change all of the variables in the GitHub Actions script so that it knows what ECR and ECS resources in your AWS account to target. Furthermore, you need to copy your ECS task definition JSON file out of AWS and add it as a file to your deployment. GitHub Actions will use this to create updated versions of your task definition whenever you publish a new image.
If you complete all of this (and configure it correctly), you should be able to see your Action run and push a new image revision to your ECR repo and run it automatically on your ECS cluster. You can click on the run of your Action and see the output for each step in your jobs. This can be useful when debugging a failed run.
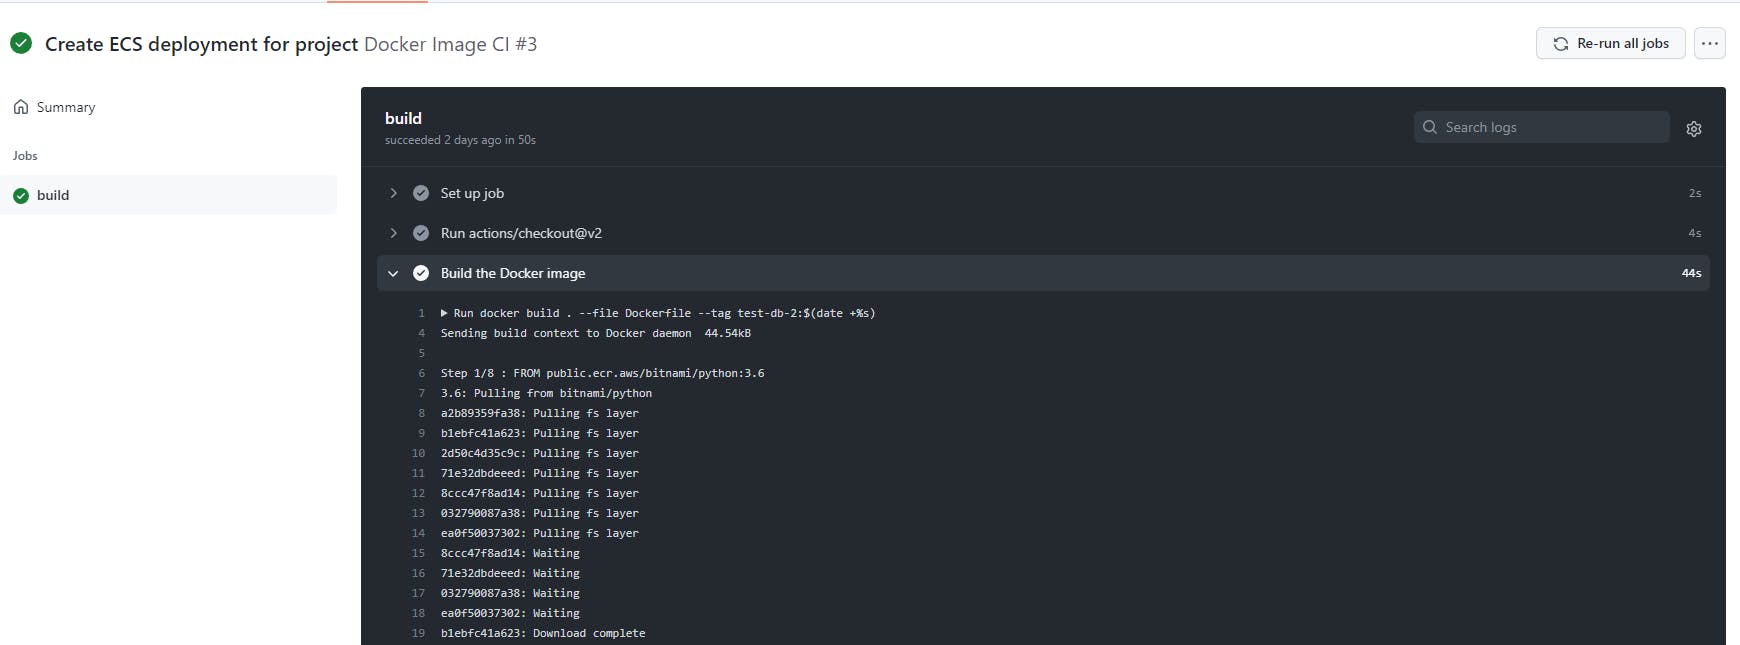
All in all, GitHub Actions makes it somewhat easy to build and deploy code from your GitHub repos into AWS. However, the default deployment actions still assume you have an existing AWS infrastructure with which to work.
Given the number of actions available and GitHub Actions' infinitely extensible nature, I've no doubt you can build impressive automated workflows with the technology. But building that out will require time and patience.
CircleCI
CircleCI, as its name implies, is a continuous integration and continuous deployment service that aims to be the one-stop shop for all your deployment needs. Its goals are similar to those of GitHub Actions and similar CI/CD systems like Jenkins, TeamCity, and Travis. (Indeed, the CircleCI docs even have a tutorial on migrating from GitHub Actions.)
CircleCI differs from GitHub Actions in a few ways. First, it provides a cleaner, more unified interface for creating, monitoring, and managing build and deployment pipelines. Compared to the GitHub Actions UI, which feels like it was jammed into the existing GitHub experience, CircleCI's interface feels modern, clean, and easy to follow.

Second, CircleCI is built for handling complex build pipelines. Their examples page contains sample deployment configurations for a number of build strategies, including sequential, parallel, and fan-in/fan-out builds. This may be why a fairly impressive list of open source projects use CircleCI as a build engine.
Using CircleCI
All that is great. But how easy is it to build and deploy using CircleCI?
As with GitHub, I wanted to see how long it would take me to figure out how to deploy my Docker container onto AWS using CircleCI. As luck would have it, CircleCI has a detailed tutorial on exactly this subject.
However, as with GitHub Actions, CircleCI doesn't touch orchestrating cloud resources on your behalf. Instead, they encourage you to install Hashicorp's Terraform and use their ECR/ECS infrastructure sample hosted on GitHub.
Fortunately, Terraform is easy to use. Utilizing CircleCI's AWS CloudFormation templates, it only took me a few minutes to configure my terraform.tfvars file to give access to my AWS account. (Down side: this file contains my AWS access credentials in plain text, which is...not great.) Using the terraform apply command, I was able to create a new ECR repository and ECS Fargate cluster.
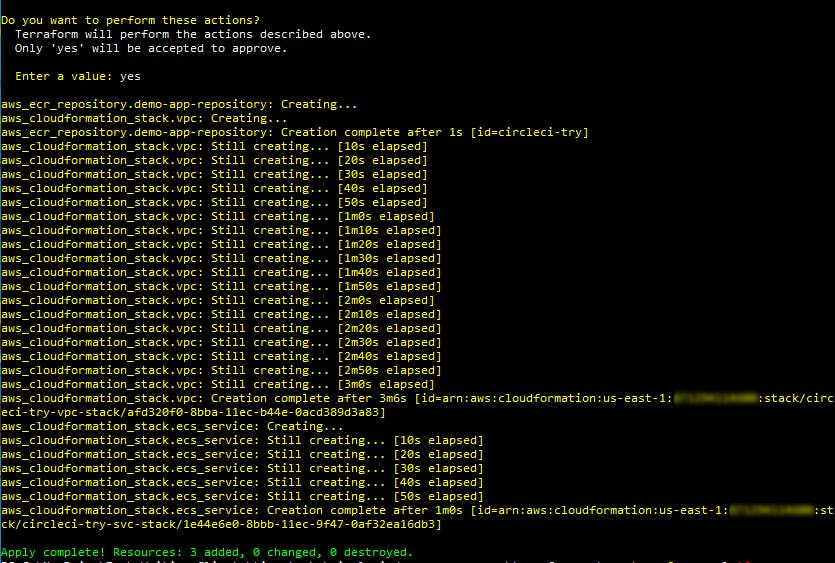
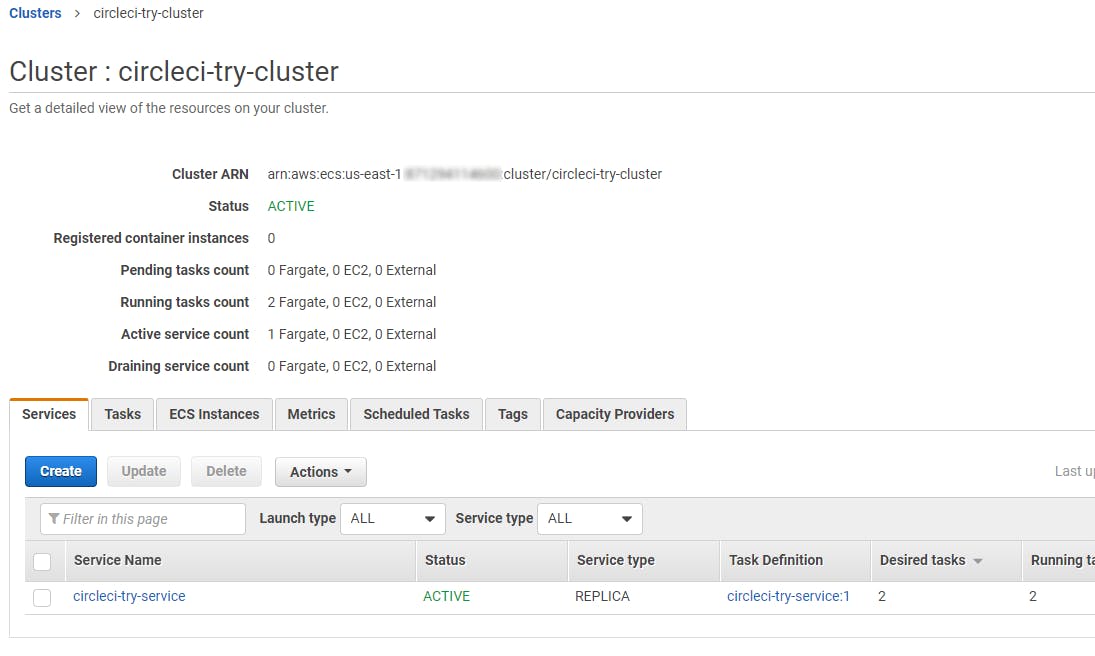
Part of what the terraform.tfvars file asked me to specify was a prefix that the tool adds to resource names. I checked the AWS Management Console and found that, sure enough, I had an ECR repo, ECS cluster, ECS task definition and service all created with the appropriate prefixes.
From there, I had to set up a CircleCI project that could push my image to ECR and then update the task definition the Terraform deployment had created in ECS. Here, the docs got a little confusing. The doc said that I needed to add some environment variables containing my AWS credentials and account info to my CircleCI project. But I didn't have a CircleCI project!
However, I noticed that the CircleCI sample repo for this project contained its own small Dockerfile. So, for simplicity's sake, I forked this repo into my own account and then clicked Projects on the CircleCI dashboard. I then created a project using this sample repo.
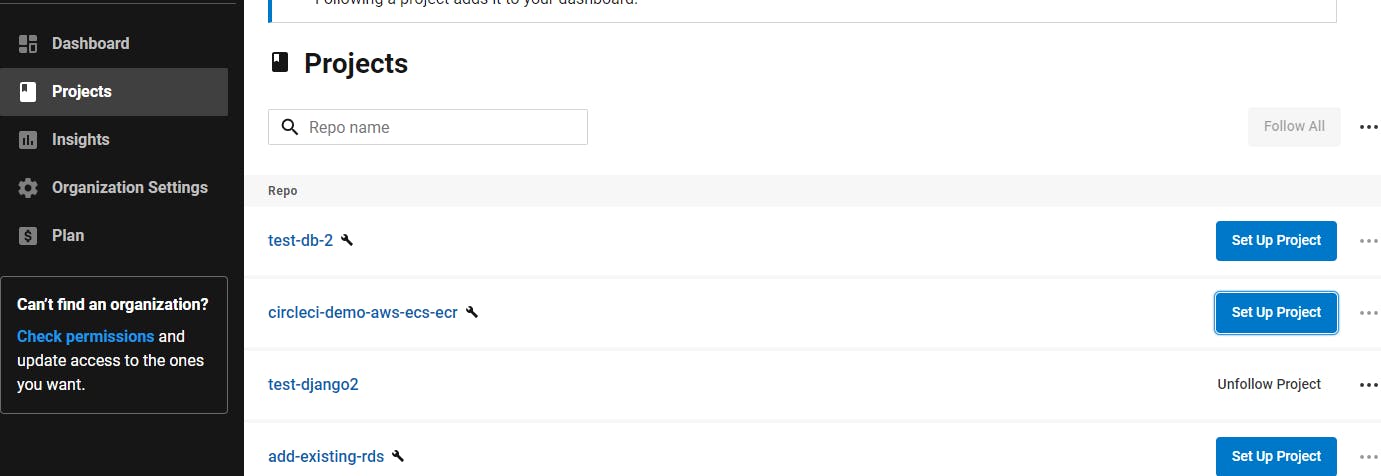
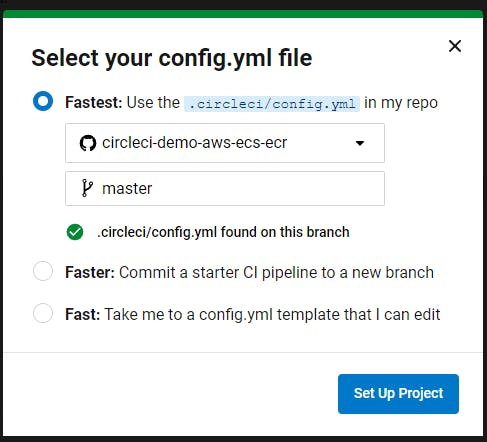
CircleCI also uses its own YAML syntax, defined in a config.yml file, to define a build and deployment pipeline. Since the sample project contains a config.yml, I was able to use that.
CircleCI attempted to kick off a build immediately. This failed because, per the tutorial doc, I needed to add some environment variables to the project to grant access to my AWS environment. You have to define six separate environment variables to get your build to work. Most of these are duplicates of the values I already put into the terraform.tfvars file:
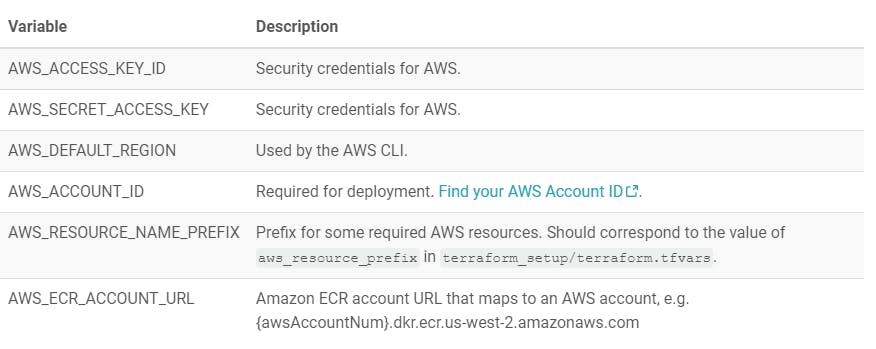
The documentation didn't specify where to set environment variables. But it was easy enough to find by clicking the ellipsis next to my project in the dashboard, clicking Project Settings, and then selecting Environment Variables.
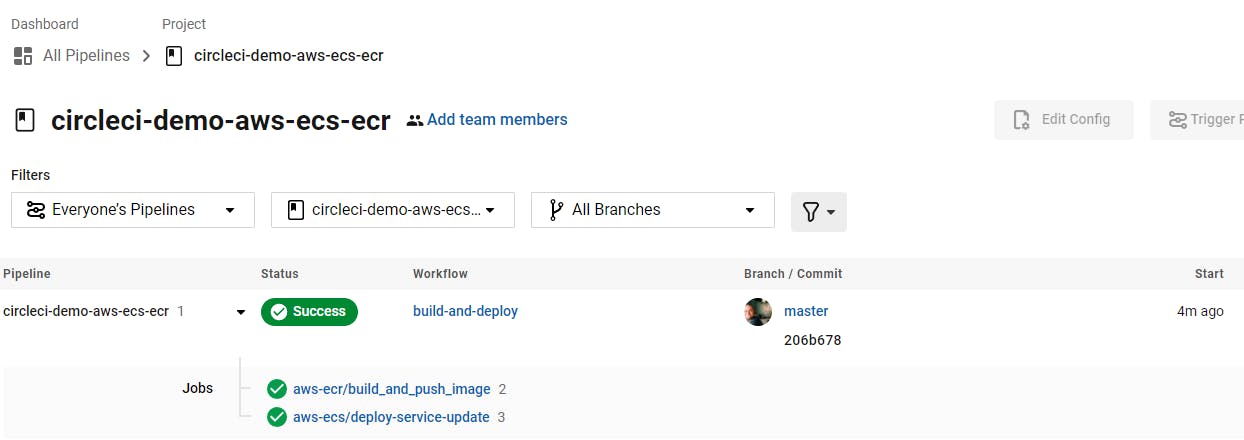
Once I defined these variables, I went back to the project on my CircleCI dashboard and clicked Rerun workflow from start. This time, I got a clean build, which means that my container was pushed to ECR and ECS and my new container image was successfully running.
Which is Better?
Both GitHub Actions and CircleCI have the same goal: provide a continuous integration and continuous deployment engine that can work with a large variety of code bases and cloud hosting providers.
Both tools share a number of strengths. Both use a fairly straightforward YAML syntax to define build and deployment actions. And both offer extensibility mechanisms for adding customized build steps.
GitHub's primary advantage is that...well, it's GitHub. Many teams already use GitHub for their code repository management. Using GitHub Actions means your team doesn't need to learn and manage a separate platform for its CI/CD solution.
However, this also means that the UI for Actions is wedged into the existing GitHub UI, which feels a touch clunky. Additionally, Actions are defined and shown on a repo. This means there's no unified dashboard showing the status for your team's builds across all of your projects. If your team has a large number of repos and ongoing builds, the lack of a single dashboard will undoubtedly make everything a nightmare to manage.
CircleCI sports a much cleaner, modern, unified UI for managing builds across a large number of projects. It also supports a number of complex build strategies.
My only major complaint was that the CircleCI documentation was a bit disjointed and hard to piece together. Using CircleCI also means learning (and paying for) yet another tool.
Overall, I'd say that CircleCI feels more suited to large, complex projects that span a number of repos. GitHub Actions seems like a great choice if you're managing builds and deployment for a handful of repos. But for large-scale teams, you'll probably want the ease of use and cross-project visibility that CircleCI offers.
Full Stack Management with TinyStacks
As we saw above, you can use both GitHub Actions and CircleCI to deploy your application as well as build it. However, both tools are focused primarily on the build (continuous integration) aspect. In both cases, you still have to create and manage the tools and templates to create the hosting infrastructure you need in your cloud provider of choice. In other words, neither tool simplifies the complexity of deploying to the cloud.
This was the problem that we created TinyStacks to solve. With TinyStacks, you can take any code base hosted in GitHub or GitLab and turn it into a fully-hosted, scalable, and secure application hosted on AWS. Setup is straightforward and doesn't require deep knowledge of AWS, Githib Actions, CircleCI, or any other tools. Already have a CI/CD tool you just love? Give us a shout.
Want to see how easy it is for yourself? Sign up for an account today and use our documentation to create your first stack!

