
Hello World Express App with Docker
Step-by-step process of Dockerization of a Node.js application, using Express as the application framework

I worked at AWS for a while, then started a company! I've grown teams, seen everything go down, developed products, and maintained services. I enjoy getting paged while taking long walks on the beach.
This post was written by Francesco Ciulla for TinyStacks
In this article, I will guide you through the step-by-step process of Dockerization of a Node.js application, using Express as the application framework.
Video Version: https://youtu.be/5NUAZSvWAo0
Prerequisites
- Node installed on your machine: You can test your Node installation by typing
node --versionat a command prompt.
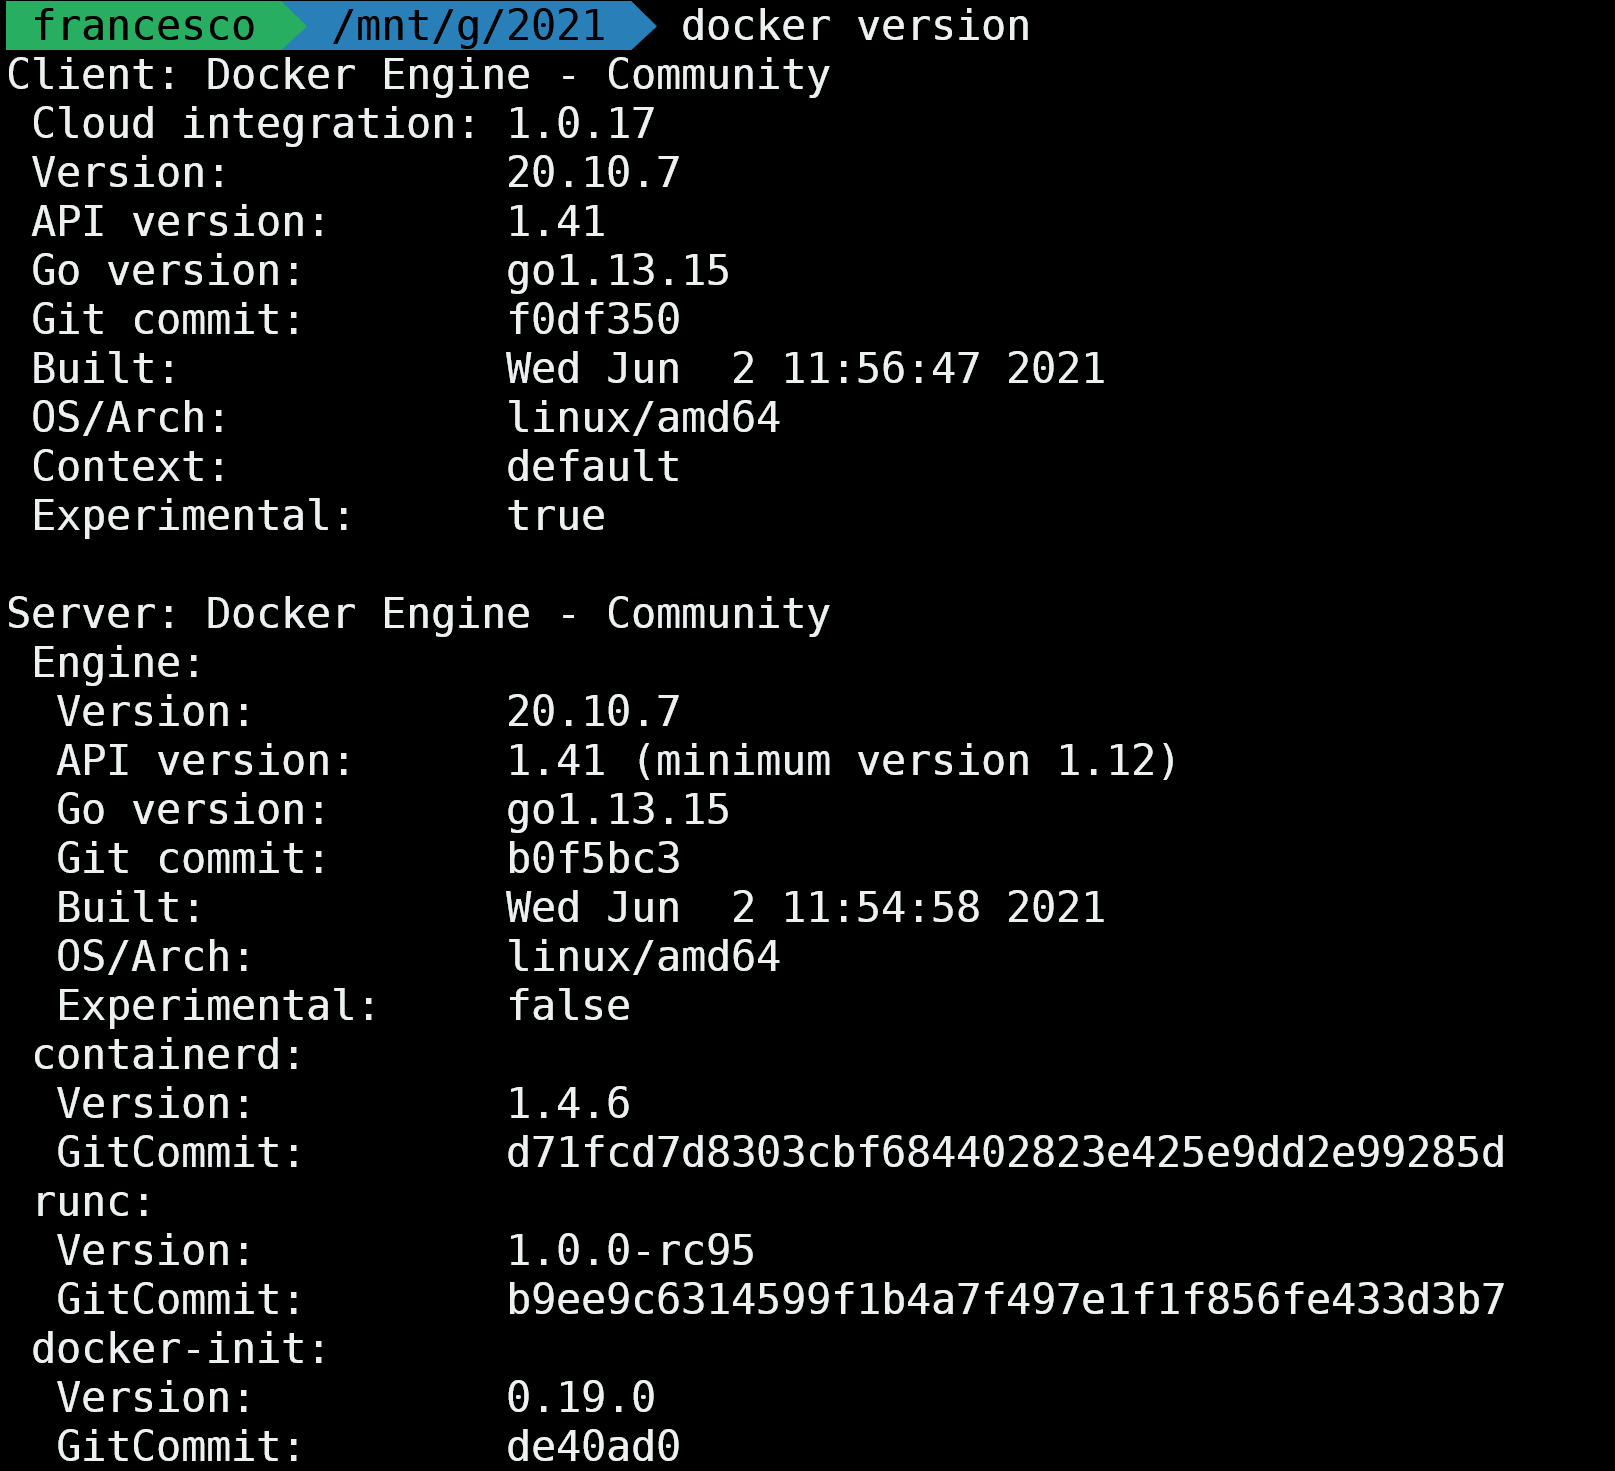
- Docker installed on your desktop and Docker daemon up and running. You can verify that Docker is installed and running by typing
docker versionat a command prompt.
 [https://www.google.com]
Node.js
Node is a back-end JavaScript runtime environment. It executes JavaScript code on a computer, such as your dev desktop or a Web server.
The good news is that, because you have Docker, you don't actually need to install Node.js. In this walkthrough, we will use the Node container image for Docker. This ensures that we avoid version conflicts between the version of Node installed on my machine and yours. It also prevents conflicts during the evolution of the application in production.
Docker
Docker is a platform to build, run, and share applications as containers. If you’re new to containers, here’s a short introductory video.
Step by Step Guide
Create a new folder and navigate into it.
You can do this from the command line using:
mkdir node-express && cd node-express
Now from the command line, initialize a new npm project:
npm init -y

In terms of other dependencies, we just need Express, the Node.js framework that will help us to create a project with a few simple commands.
npm i --save express
Creating Our Express App
Now we are ready to write our first Hello world code. Open the project with your favorite IDE. To open it with VS Code using the terminal, you can run the command:
code .
I also use some VS code extensions that you might find useful:
- Material Icons: Custom pretty icons for vscode files and folders
- Docker extension: It helps to find images and provides documentation Dockerfiles and docker-compose files (we will see this in upcoming articles)
- Tabnine: An AI helped auto-completion tool, it's useful to have and it works on dockerfiles, too
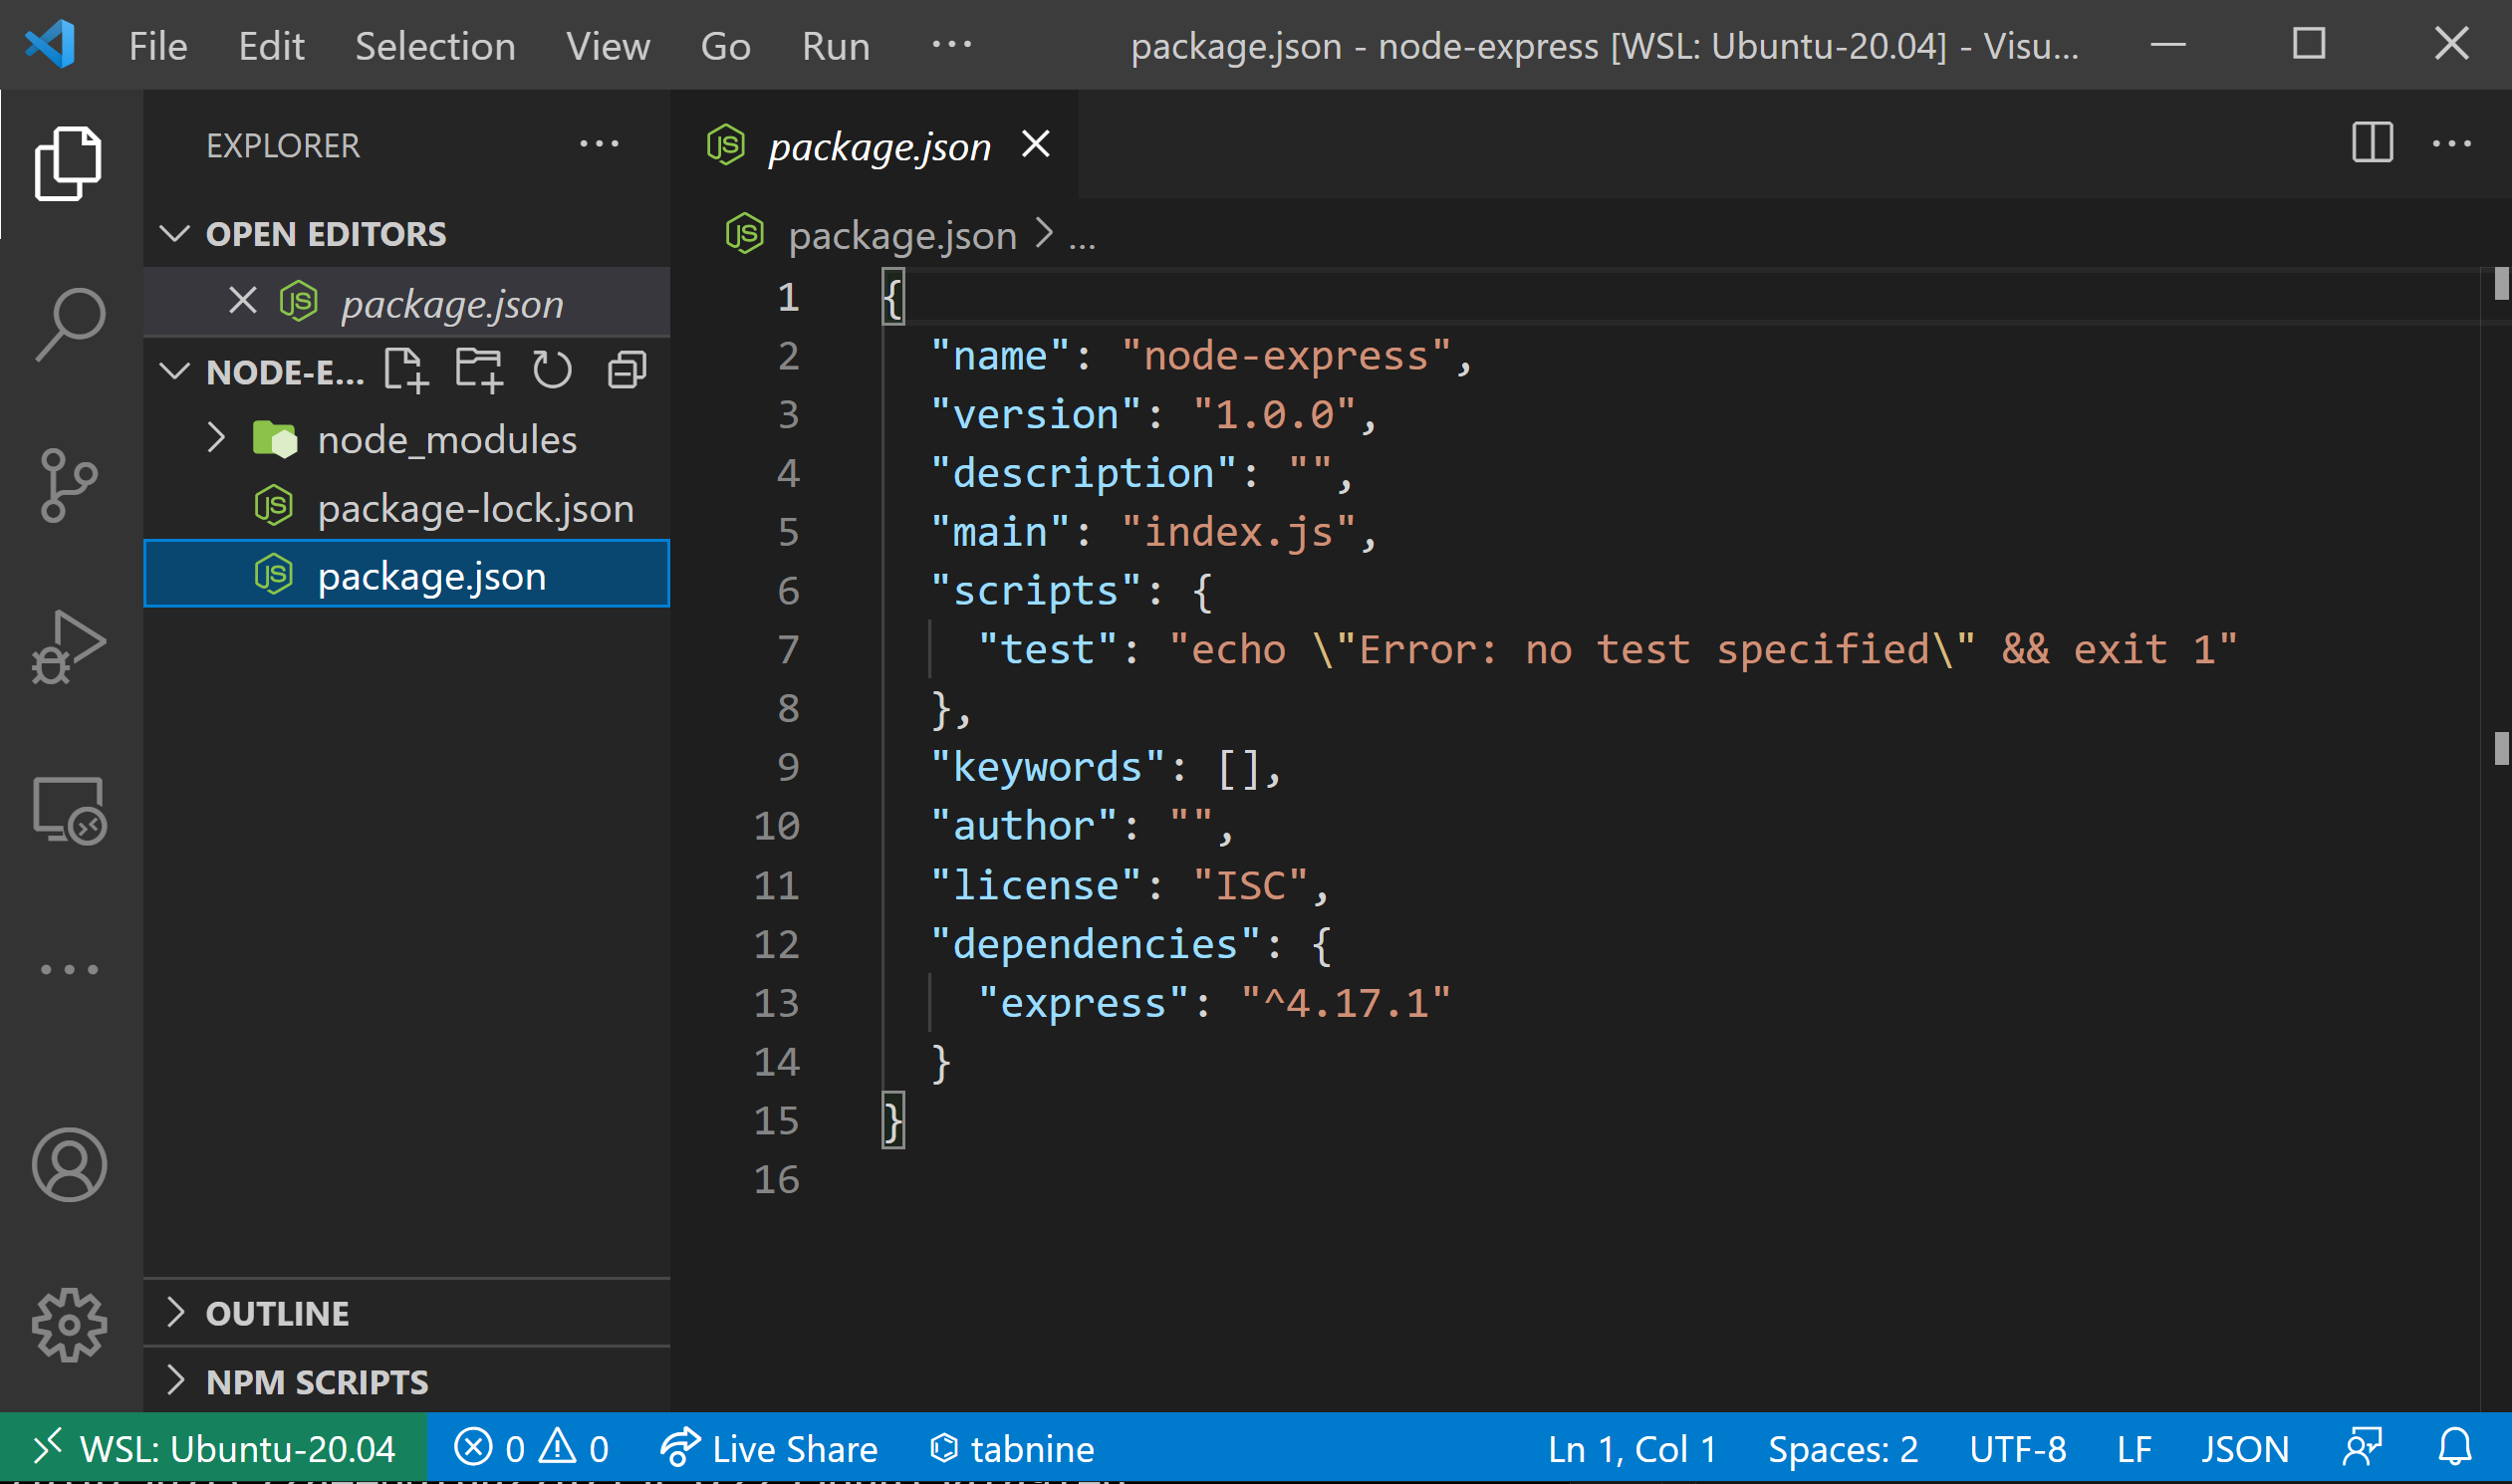
Your project should look like this:
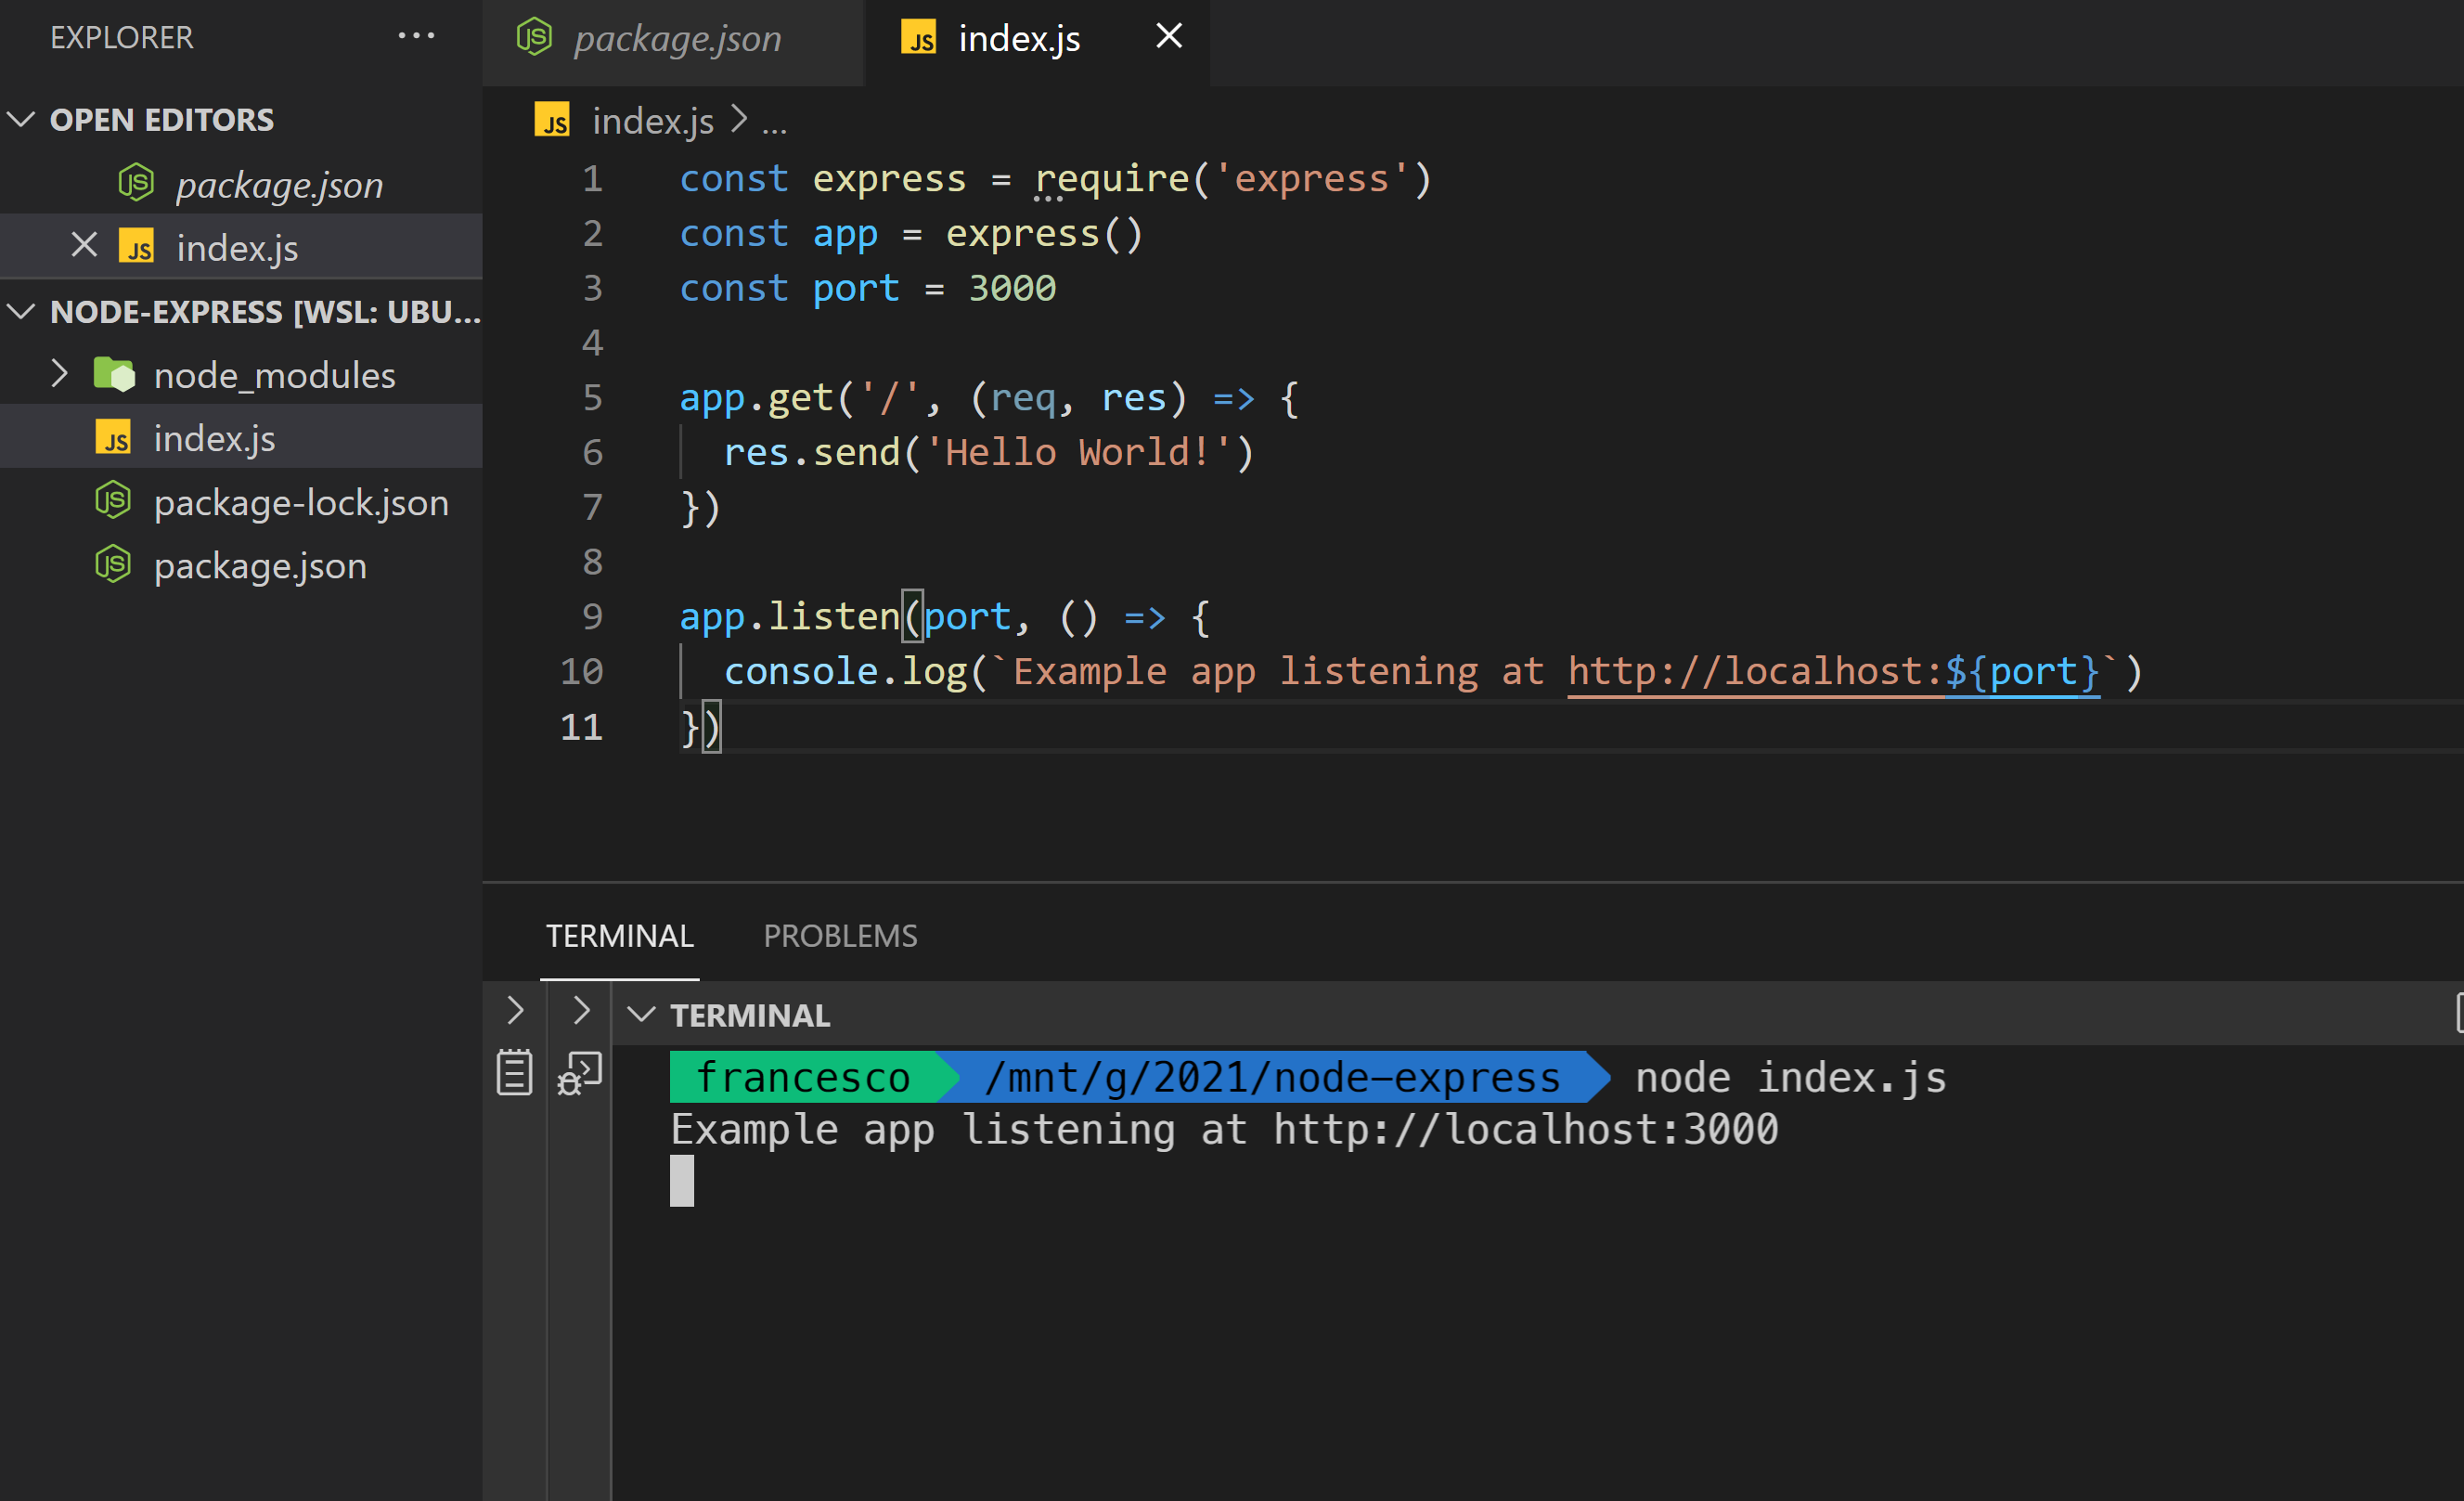
We will start by creating a simple hello world app using Express and the following sample code:
To do this, we create an index.js file. We can do this in different way but from a Unix command prompt we can type:
touch index.js
And then we populate the file with the following code:
const express = require('express')
const app = express()
const port = 3000

app.get('/', (req, res) => {
  res.send('Hello World!')
})

app.listen(port, () => {
  console.log(`Example app listening at http://localhost:${port}`)
})
Now we can run this simple application. Remember that Express starts its own Web server, so we don't need something like nginx or Apache to run our application.
node index.js
Now let's check the browser:
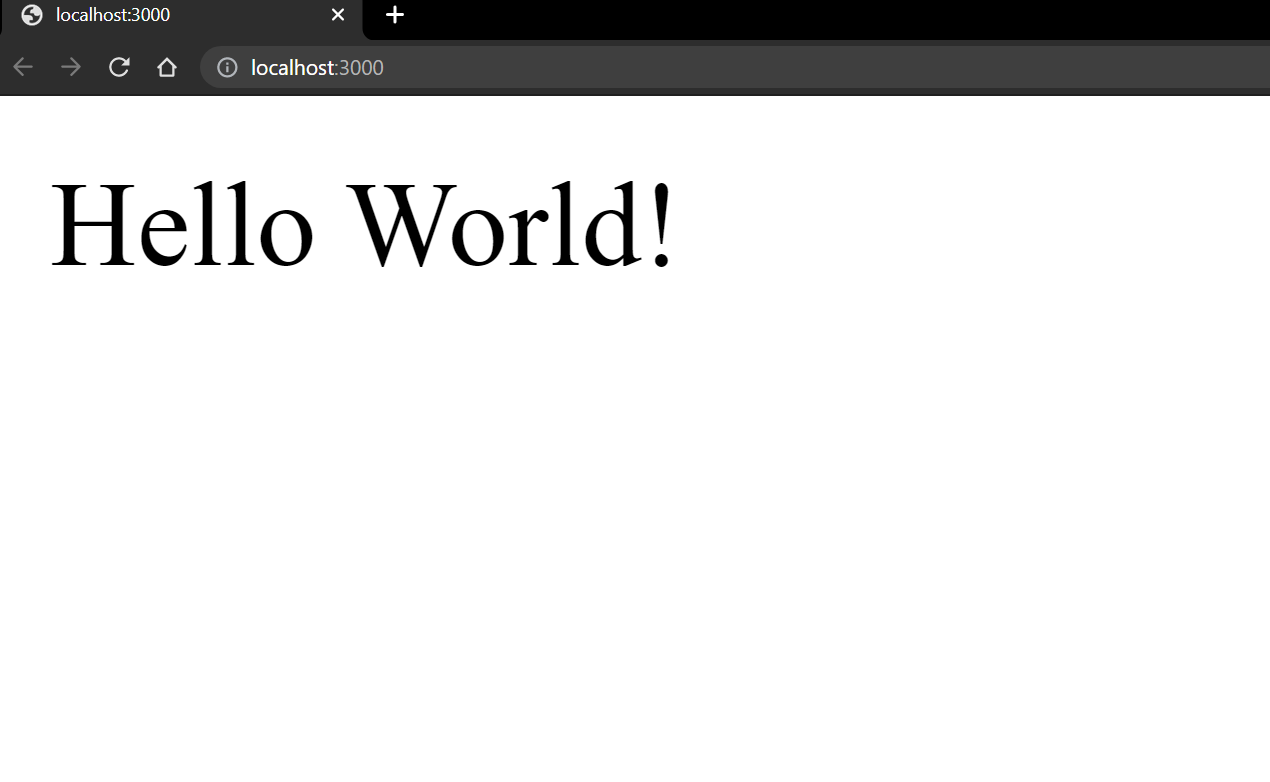
Exciting? Not much, but it works!
To run this example, I need to have Node installed on my machine. Which isn’t a big deal, right? If we were in a production environment, we could just Install Node.js, yes?
Well, here’s where our problems start, - especially with versioning. Instead of managing different versions of Node.js, we can use Docker to create an image and standardize on the node version so there are no conflicts when deploying in production.
To start, let's create a file called Dockerfile (capital d, no extension). A Dockerfile is a text file composed of KEY VALUE pairs. Its keywords are typically written in uppercase.
FROM node:16

EXPOSE 3000

WORKDIR /app

RUN npm i npm@latest -g

COPY package.json package-lock.json* ./

RUN npm install --no-optional && npm cache clean --force

COPY . .

CMD ["node", "index.js"]
Let's examine each line one by one.
FROM: Our base image. With Docker, we usually don't need to start from scratch. Here, we start from an existing Node image, which in turn is based on a Linux Distribution image.EXPOSE: This line is more for documentation purposes. It's helpful to inform users that we will use this port for our application.WORKDIR: The default directory for our image. We will check its contents later when we take a peak inside our container.RUN: Run system commands such asapt-get updateor install packages using the appropriate package manager.RUNduring docker build. It’s a powerful command but should only be used when no other option is available. The RUN instruction executes any commands in a new layer on top of the current image, then it commits the results. it's useful to execute commands that otherwise we should type at the command prompt.COPY: Copies folders and files from the specified path inside the image filesystem. In this case we are just copying the package.json, and the package-lock.json, if it exists (with a small regex trick). The format is SOURCE DEST, so we are copying the files in the current directory (./).
The last COPY command is used to copy all folders and files in the current development folder inside the Docker image’s filesystem. But that’s a problem.We have the current node_modules in our development environment, but we don't want to copy it; we want to install these files from our package.json and package-lock.json files instead. We need this because of two reasons: the first is that our codebase will be way lightweight, and the second one it's because maybe we want to install just some of the dependencies, for example in production.
To avoid copying some files or folder, we have two approaches:
COPY only the exact files and folders we need. The downside here is that if we add some folder or files outside the existing ones, we need to remember to also add them to the Dockerfile.
CMD: provides a default command for a container, which can be overwritten. In this case, it will replace we typing "node index.js" from the command line
- Create a ".dockerignore" file, which will contain all the folders we want to ignore in the copy process.
We are going with this second approach here, so let's create the file. From your desktop command prompt, type:
touch .dockerignore
Don't forget the dot at the beginning, all lowercase.
in the .dockerignore files, we can select the folder and files to ignore during the copy.f you know Git, this is very similar to what a .gitignore file does.
Here is our final .dockerignore file:

Building Our Image
Now it's time to build our image based on our current Dockerfile. Please note that, at the end of a command, where you see the dot, that's a path indicating the current directory. It’s common to use this “here” syntax to run a Dockerfile from its current directory. But it can also be run from a different folder.
docker build -t node-express:1.0.0 .
Some notes on this command:
docker buildis a shortcut fordocker image build.-tstands for tag. Docker tags are similar to Git tags; they basically givea name to a Docker image. A Docker image can have multiple tags. For now, we will only assign it one. (Side note: if we specify a tag, but without a version, for example-t nodeimage, the final tag will be "nodeimage:latest". This can be confusing, as docker treats “latest” as “default”. Bad naming, as it's not necessarily the latest in a chronological sense.)- The dot at the end is the path to the Dockerfile. It's a common practice to run this command from the same folder where your Dockerfile is located.

Let's spend a minute talking about the build process.
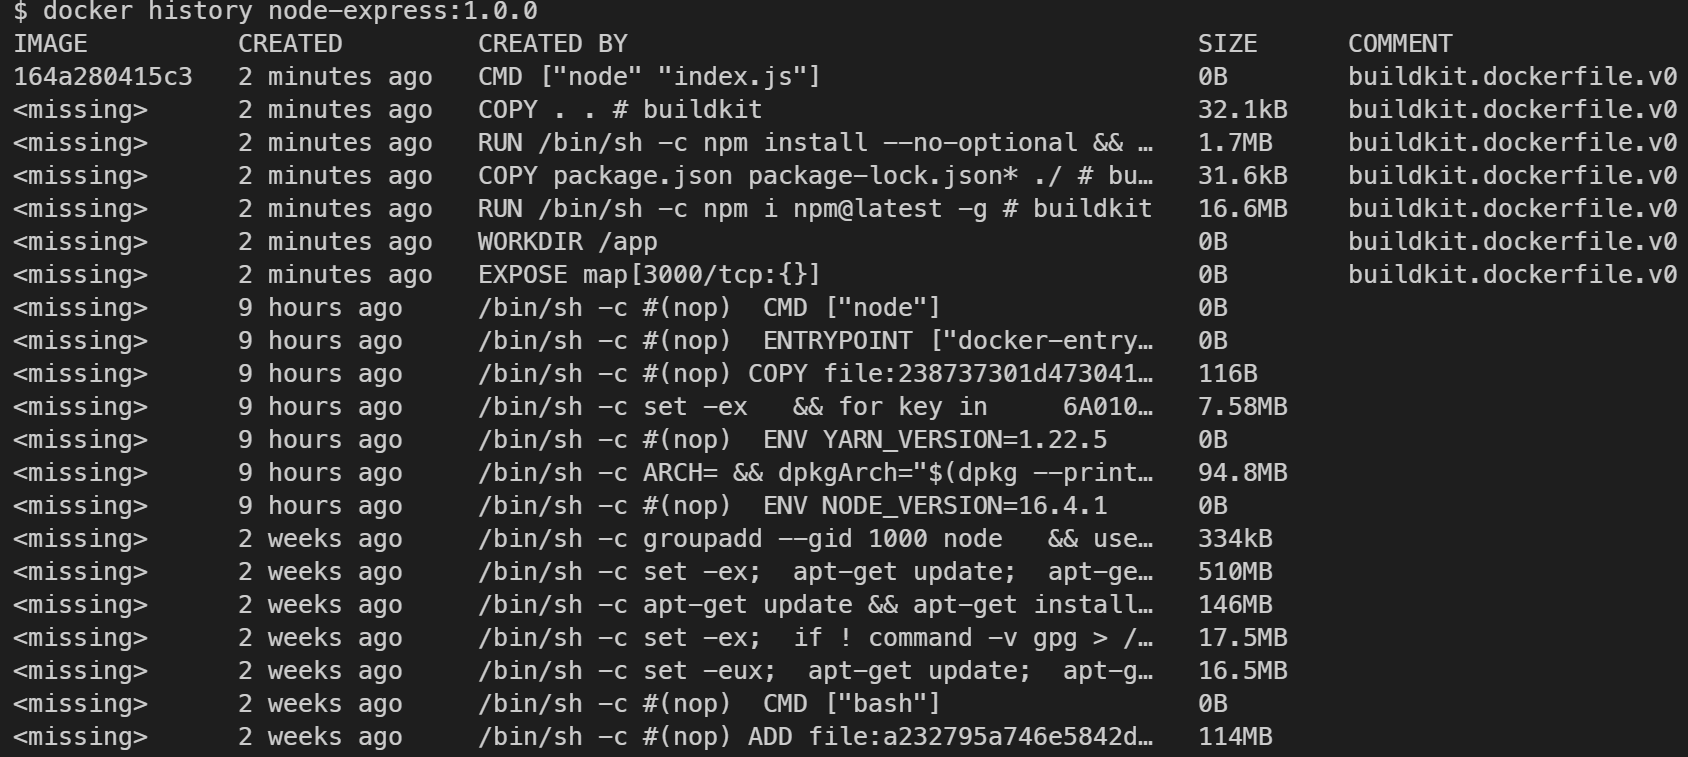
As you can see, there are six stages, which more or less correspond to our Dockerfile lines! Each stage produces a layer for the image. this layered system is very useful, because it allows to save space on the disk (the same layers of the different images is not downloaded multiple times on the same host), and it's also useful on the subsequent building processes as if a layer hasn't changed, it's just cached and it doesn't have to be built again). In fact, Docker images have a layered system, which you can verify with the "docker history" command:
docker history node-express:1.0.0
Now, let's check our current images:
docker images

To run the container based on the image, run this command:
docker run -p 3000:3000 node-express:1.0.0
the -p option is short for --publish, and it's the option to expose a port outside the container.
Unfortunately, you’ll see that our command prompt is blocked by our application. To stop it, we can use CTRL+C (or CMD+C on Mac).
Now, if we try to check the current containers:
docker container ls
Or shortly “docker ps” We can't see the container.

WHERE IS IT?
Let's type:
docker container ls -a

To remove the container, use the docker rm command
docker rm <container_ID>
To start the container again in detached mode (so that it doesn’t block our command prompt), we can use the -d option. We can also specify a name for a container - otherwise, Docker will generate a random one from a list of well-known programmers and scientists.
docker run --name webserver -d -p 3000:3000
In this case, to see all the old and upcoming logs (-f stands for --follow):
docker logs -f webserver
Peeking Inside Our Container
Now, let's try something interesting, let's see how do we get inside the container. We could use something like SSH for this. But that's not necessary. Instead, we can use the handy docker exec command:
docker exec -it webserver bash
-it actually represents two options:
-i: to keep our login to the Docker containerinteractive
-t: to open a pseudo tty
Here, we launch the bash shell in the current container. We are basically replacing the node index.js command with a running Bash shell.

And lo and behold, we are now inside the container!
If we type:
ls
we can check the current filesystem. nd if we type:
node --version

- we can see the version of Node.js inside the container. This is independent from the version of Node.js on our developer desktop desktop. We could even uninstall Node.js from our desktop and the container would continue to work.
Pushing Our Image to a Repository
A repository is a set of Images, with different names and tags. It's useful to have, in the same place, multiple images with different versions of the same version, e.g. the Official Node one.
To push our image to an existing repository, we first need to retag our image with our dockerHub username:
docker tag node-express:1.0.0 francescoxx/node-express:1.0.0
After creating the repository, we can push our image:
docker push francescoxx/node-express:1.0.0
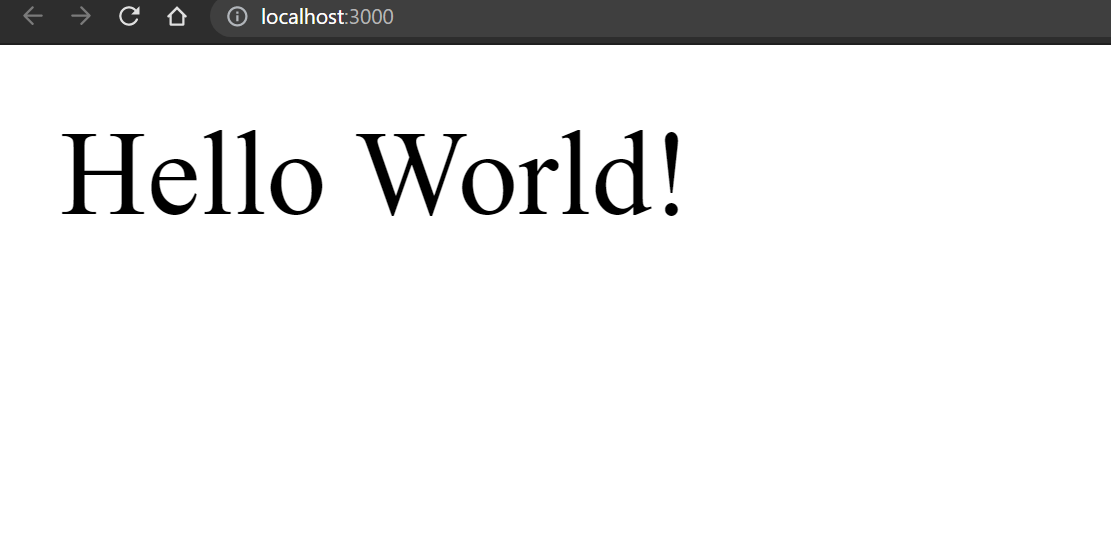
Now we can run this image from any machine using the command
docker run -p 3000:3000 francescoxx/node-express:1.0.0
Thanks for reading Here is a video Version of this Article: Video Version: https://youtu.be/5NUAZSvWAo0


