How to create an Express app with a Local Postgres Database and Docker Compose
How to handle multiple containers with a Node.js and Postgres example
Video Version: youtu.be/qczbRQtmCDo
In our most recent articles on Docker, we looked at standing up a basic CRUD app with Docker and using storage in Docker containers. In this article, we will be using Docker Compose for the first time.
Docker Compose is a very powerful tool that’s used to manage multiple containers, called services, with a single file.
A key concept to understand is that, when we say Docker Compose, we must distinguish between the docker-compose.ymlfile (which will look like the picture below) and the docker compose CLI, the set of commands we can type directly at the command prompt.
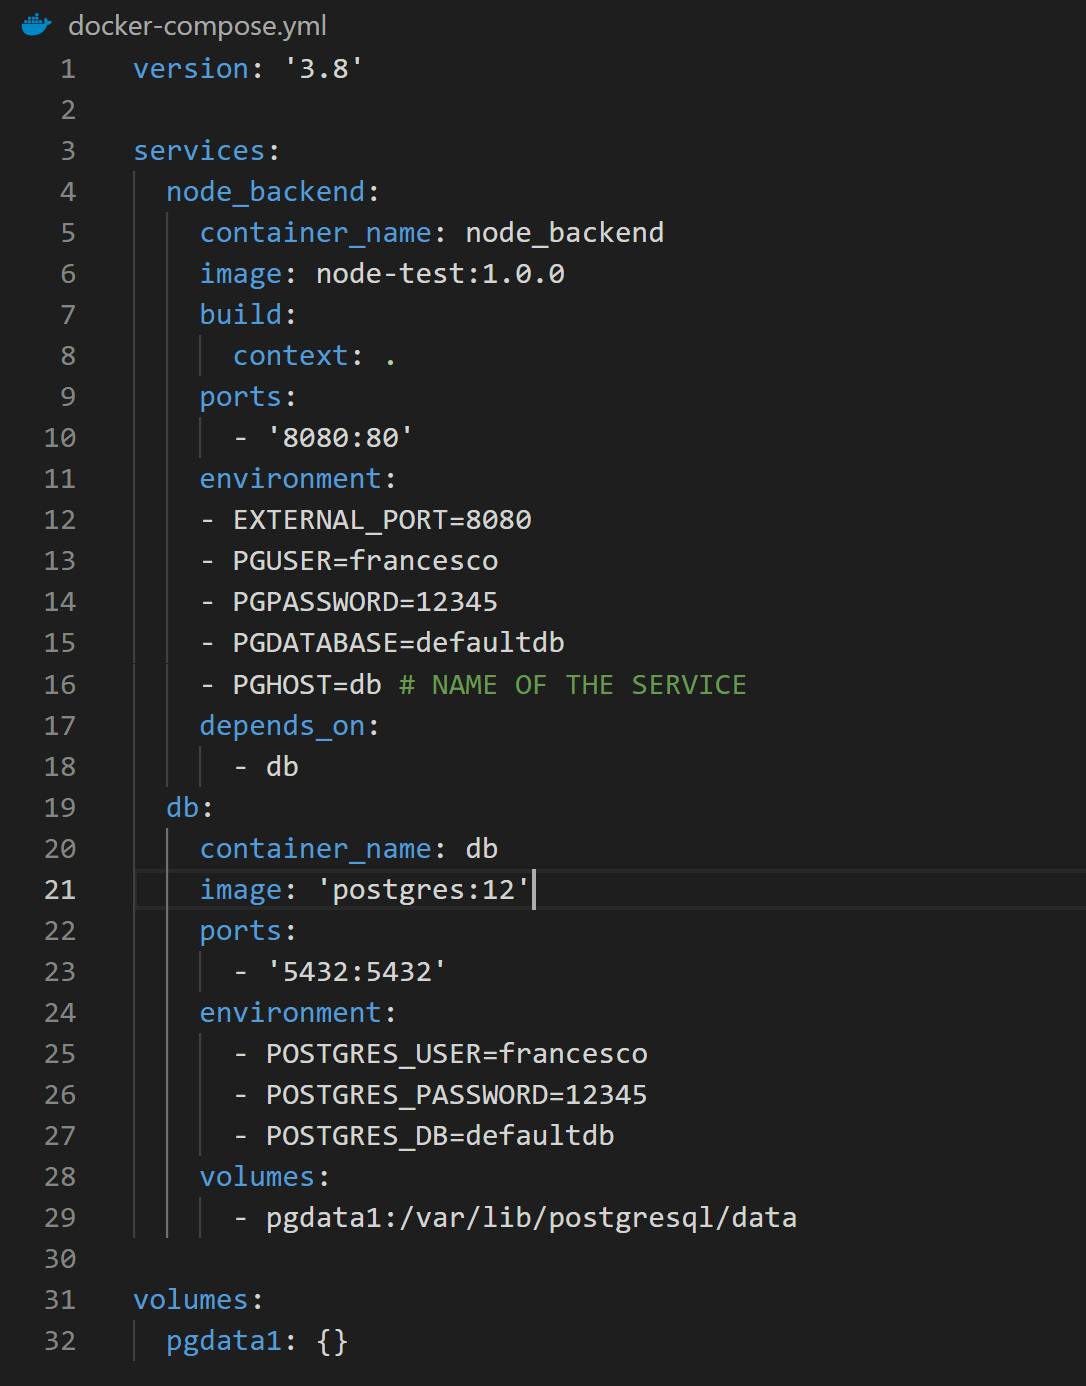
In this article we will use the latest version of the docker compose CLI - docker compose (without the dash). It’s written in the Go programming language and is perfectly compatible with the previous Python version, called docker-compose (with a dash). They both work and, for this tutorial, it makes no difference which one you use!
So Docker Compose is used for managing multiple containers. Do I have to have many services to use Docker Compose? No, actually - it can also be used with a single service. In this example, we will start from the TinyStacks Express repository and add what we need to make our application communicate with a database - in this case, Postgres.
Let's begin!
Demo
First of all, to check if Docker is up and running and see some available commands, open a command prompt and type:
docker compose --help
You should get something like this:
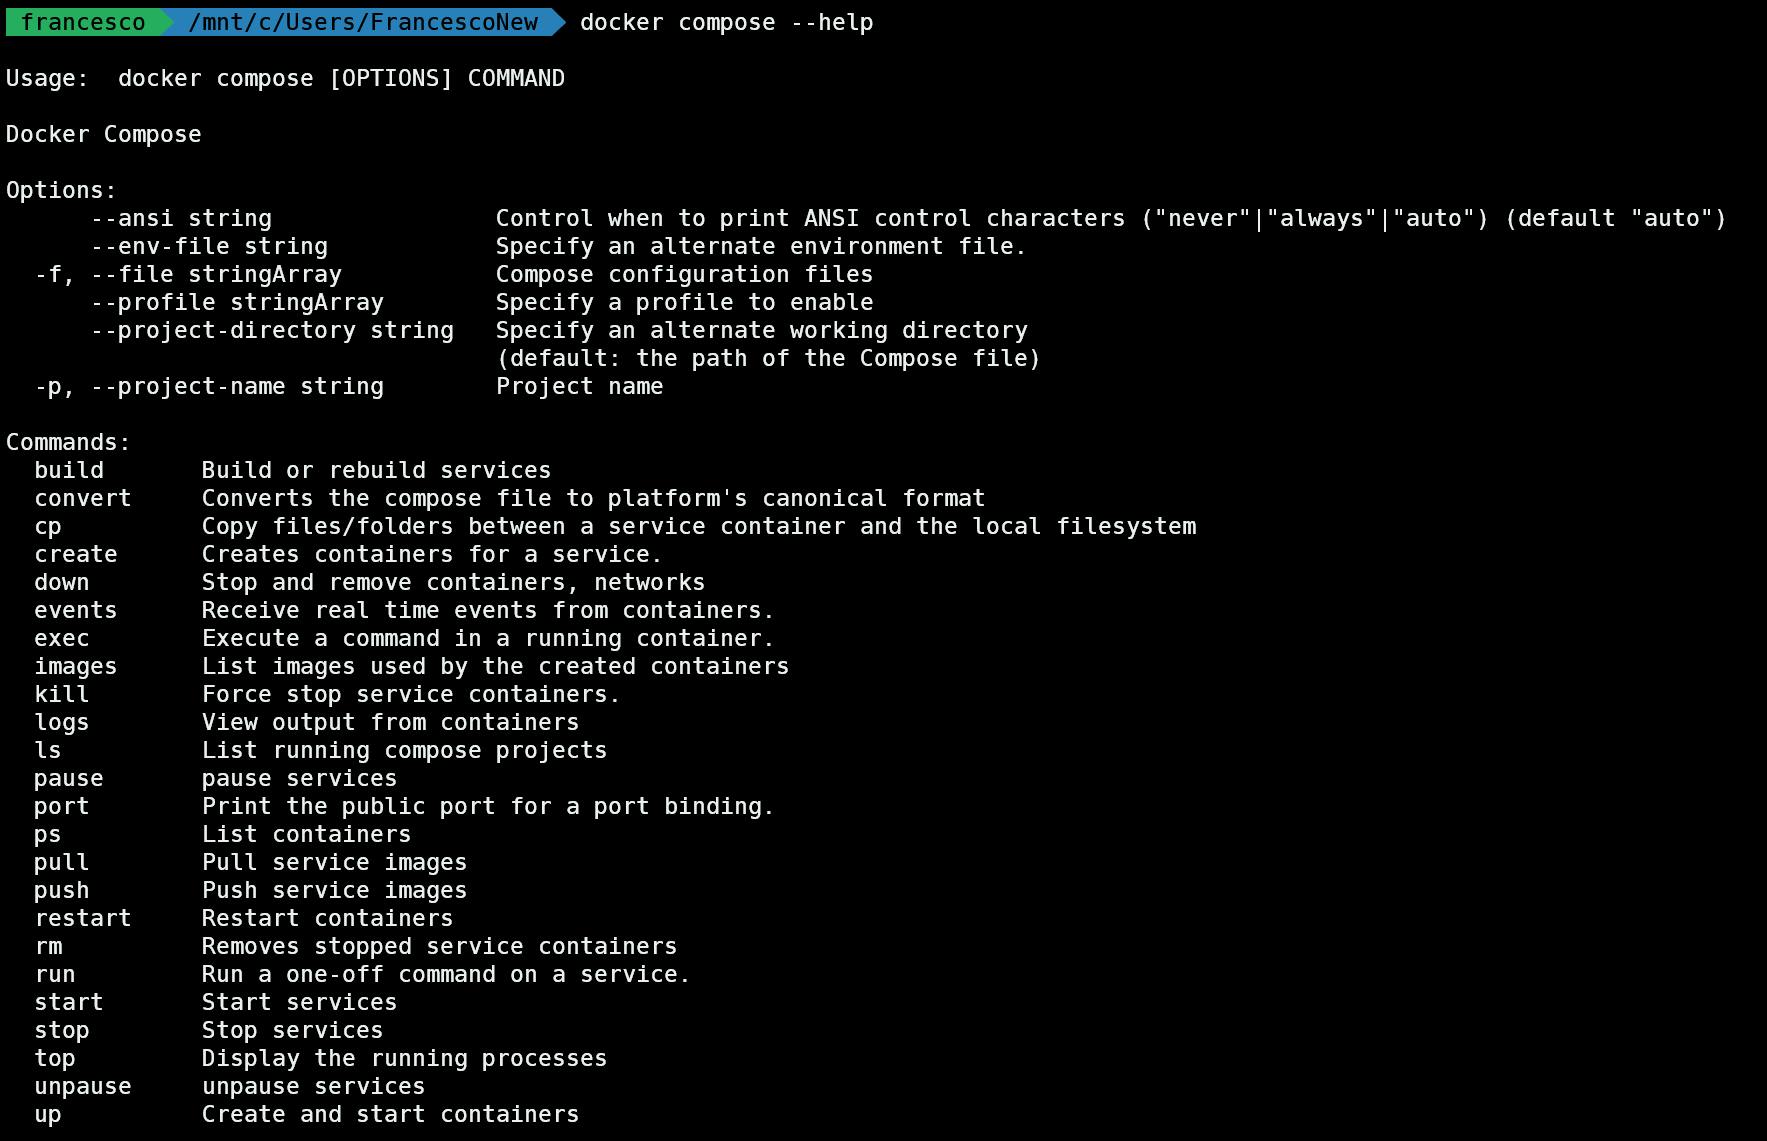
These are all the basic commands available for docker compose. Don’t worry, you don't have to memorize them all.
Now, let's clone the public Tinystacks repository:
git clone https://github.com/tinystacks/aws-docker-templates-express.git
Get into the directory:
cd aws-docker-templates-express
Open the folder with your favorite IDE. If you are using Visual Studio Code, you can type at the prompt:
code .
Install the Dependencies
We need some more dependencies for this demo:
- (pg)[npmjs.com/package/pg], which is the NPM package to connect Postgres.
- (sequelize)[sequelize.org/], which is an Object Relational Mapping (ORM) tool. We could use another ORM package or even not use an ORM at all. The ORM is helpful because it’ll help us automatically create the table and make inserts, updates and deletes without writing SQL commands.
npm i pg sequelize
Since we are using Typescript, we can optionally install sequelize types for Typescript:
npm i --save-dev @types/sequelize
Edit the Current Repository
You can edit the current repository according to your needs! Let’s step through an example.
In the src folder, create a new folder called .util.Navigate into this util folder and create a new file called database.ts.
At this point, your folder structure should look like this:
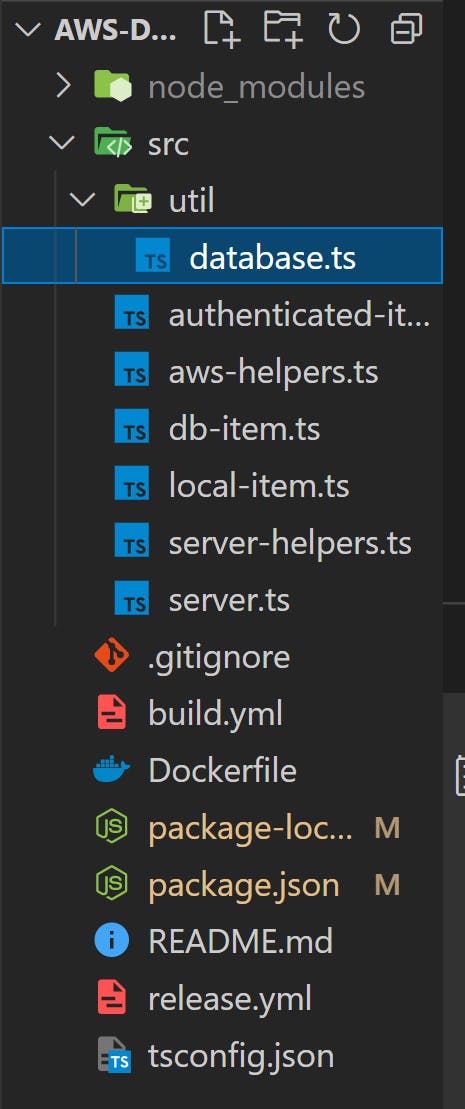
This file is needed to configure the database connection between our Node.js backend and the Postgres container.
Populate the database.ts file with this command:
const Sequelize = require('sequelize')

const sequelizeInstance = new Sequelize(
  process.env.PGDATABASE,
  process.env.PGUSER,
  process.env.PGPASSWORD,
  {
    host: process.env.PGHOST,
    dialect: 'postgres',
  },
)

export default sequelizeInstance
process.env.XYZ (where XYZ is our variable name) is how Node.js stores and reads environment variables. Here, we have four:
PGDATABASE: The database to connect to. This will be created by Postgres as soon as we start the Postgres container.PGUSER: The default database user.PGPASSWORD: The default user’s password.PGHOST: IMPORTANT! This is how the Node.js application will find the Postgres container. We will see that Docker finds the containers by the container name.
User Model
Now let's create a template for our database to store information about our users. We will create a specific file, inside a models folder, which will be read by Sequelize to create a table and perform all the necessary SQL queries. Again, this is not strictly necessary, but it’s very convenient to focus on the important part that will come soon: Docker Compose.
In the src folder, let's create a folder called models. Inside this folder, let's create a file called users.ts`.
Let's create our model with these fields:
- id
- username
- password
import * as Sequelize from 'sequelize'
import db from '../util/database'

const User = db.define('users', {
  id: {
    type: Sequelize.INTEGER,
    autoIncrement: true,
    allowNull: false,
    primaryKey: true,
  },
  username: {
    type: Sequelize.STRING,
    allowNull: false,
    unique: true,
  },
  email: {
    type: Sequelize.STRING,
    allowNull: false,
  },
  password: {
    type: Sequelize.STRING,
    allowNull: false,
  },
})

export default User
Here we define a new users table. This will be created by Sequelize as soon as we synchronize it.
Controllers
in the src folder, let's create a new controller file to handle the different API calls. Let's call it local-user.ts, to be consistent with the existing local-item.ts.
For this to work, we must import:
- Types for HTTP requests in typescript
- The headers for the responses
- The database configuration (the
database.tsfile inside theutilfolder) - The user's model, by importing the
users.tsfile into the model folder
Let's add these 4 lines to the beginning of the file:
import { NextFunction, Request, Response } from "express";
import { addHeadersToResponse } from "./server-helpers";
import sequelize from './util/database'
import User from './models/users'
We will create five endpoints, in order, using the appropriate HTTP request methods to implement each:
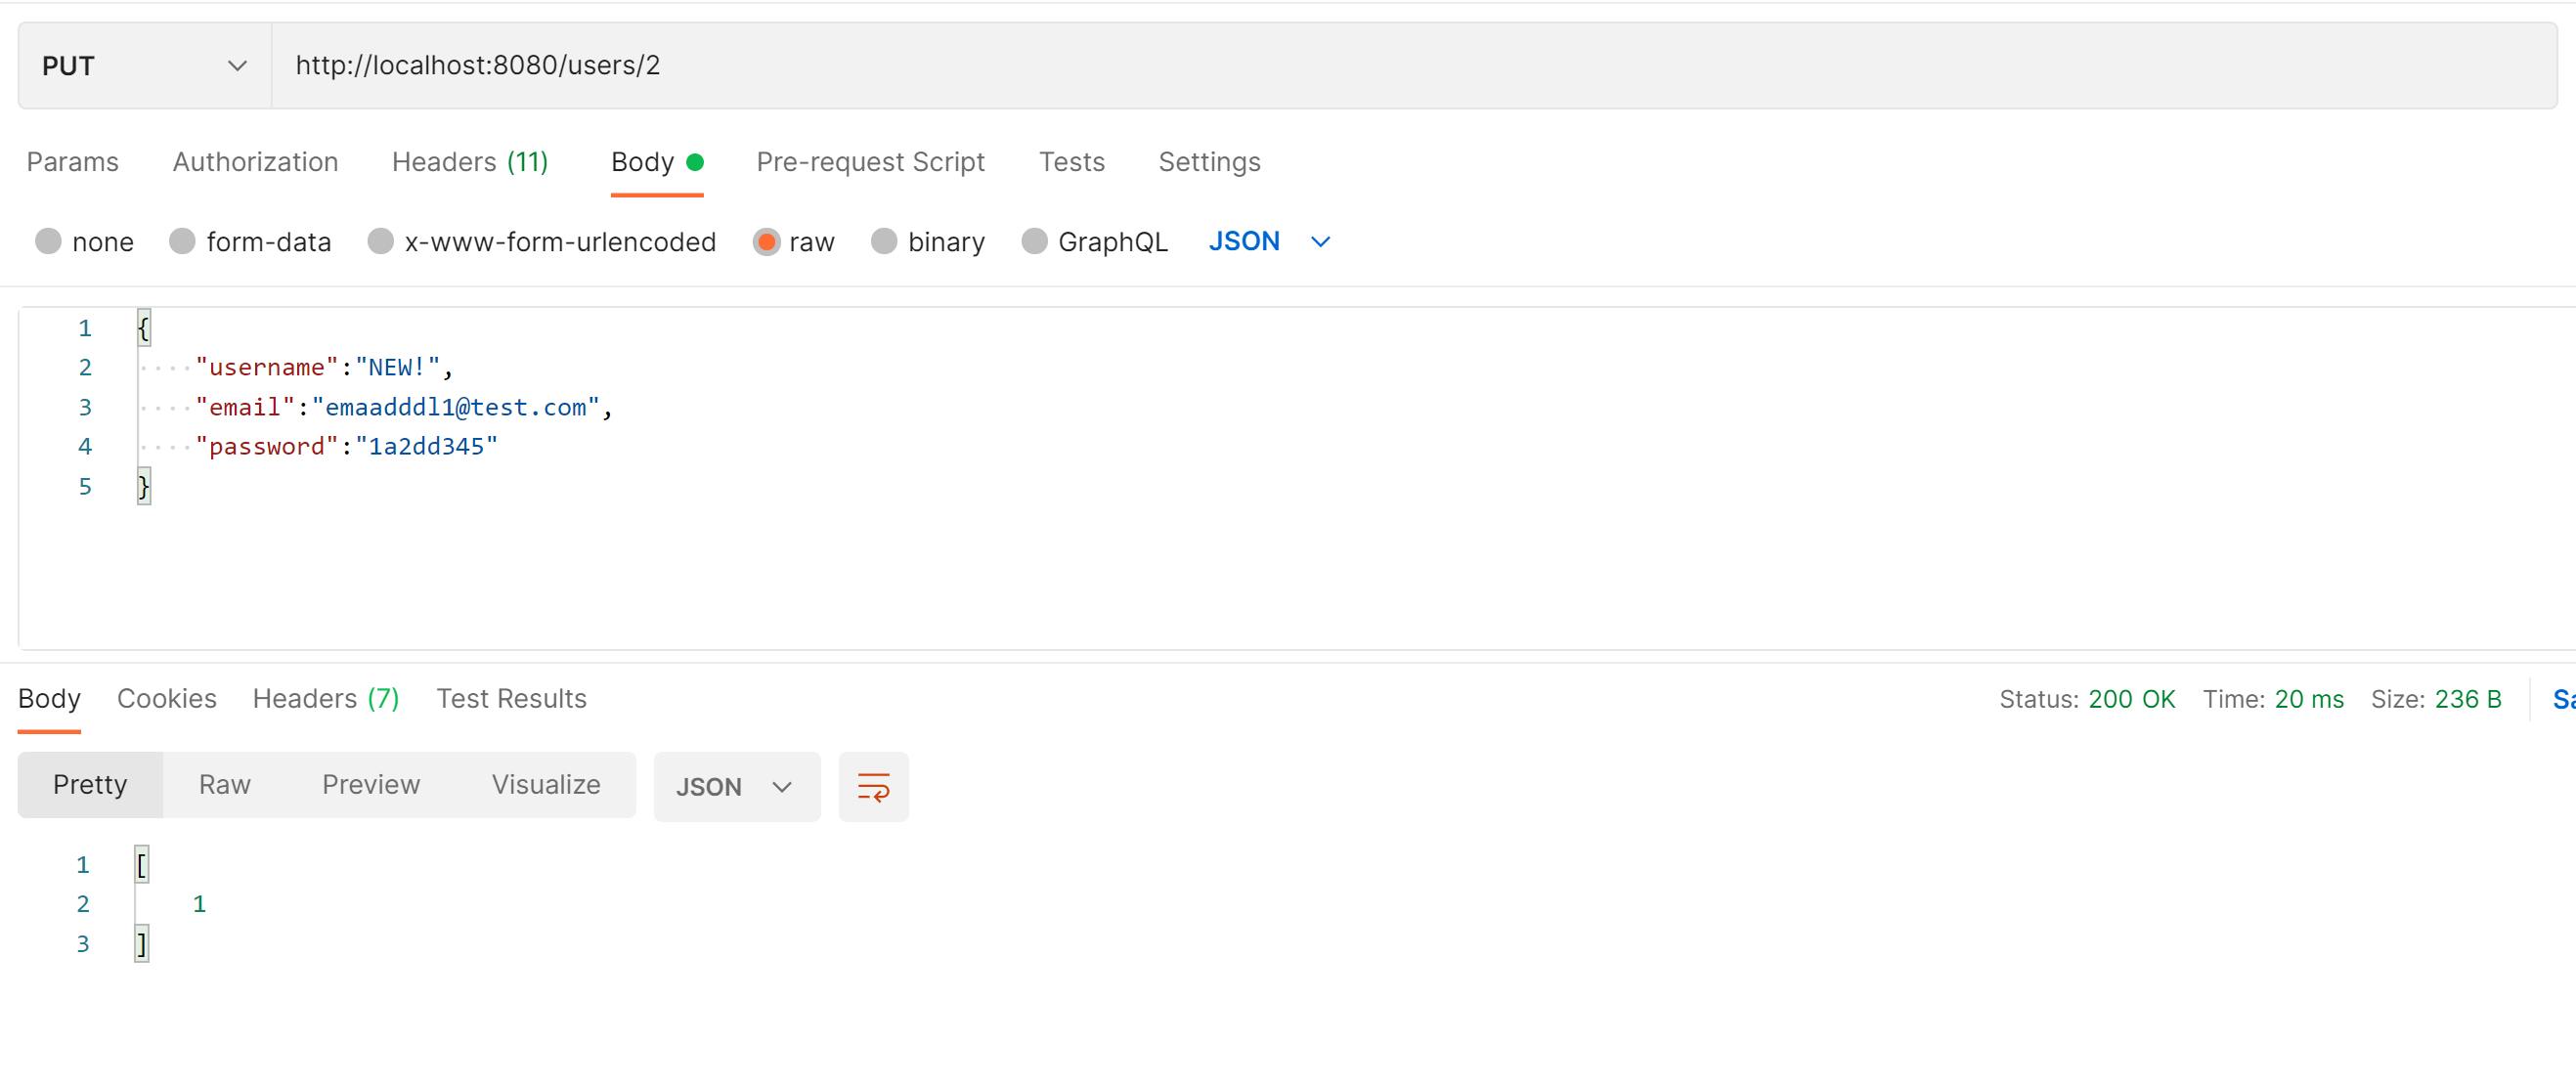
createOne: A POST request to create a new user. The POST body contains the JSON with the necessary parameters. Note that we do not enter the user id; Postgresenters this automatically as an auto-increment. In case of success, we return the object and 201 HTTP status code; in case of error, we return a 500 status.getAllGET request that selects all the users in the table and returns them as a JSON array. To show them to the user, we use themapmethod and insert all the values in the elementdataValues. If there’s an error, we return a 500 status.getOneGET request to return a single user. We use the id parameter to perform a search using thefindByPk(find by primary key) method.If the user exists, it is returned as JSON. If there is an error, we return a 500 status. If the user does not exist, we return an empty object with a 200 status, because it isn’t an error with the database but simply a user who does not exist. This could be handled better for sure!updateOnePUT request to modify an already existing user. This is for demonstration purposes only; proper error handling here would be quite complex and is dependent on many factors. The base case shown here requires a PUT body with the new parameters and the id in the URL. In case of a malformed request we return an HTTP 400 error in case of error, we return 500; and in case of correct modification we return a 200 status and a response body of1, which means that one (1) row has been modified in the database.
-deleteOne:
DELETE request to delete an existing user. Just pass the id in the URL and the user’s record will be removed from the database.
import { NextFunction, Request, Response } from "express";
import { addHeadersToResponse } from "./server-helpers";
import sequelize from './util/database'
import User from './models/users'

/**
 * CRUD CONTROLLERS
 */


export async function createOne(req:Request, res:Response, next:NextFunction) {
  console.log('createOne: [POST] /users/')
  try {
    const USER_MODEL = {
      username: req.body.username,
      email: req.body.email,
      password: req.body.password,
    }

    try {
      const user = await User.create(USER_MODEL)
      console.log('OK createOne USER: ', user)
      return res.status(201).json(user)
    } catch (error) {
      console.log('ERROR in createOne ' + 'USER:', error)
      return res.status(500).json(error)
    }
  } catch (error) {
    return res.status(400).json('Bad Request')
  }
}


export async function getAll(req:Request, res:Response, next:NextFunction) {
  console.log('getAll: [GET] /users/')
  try {
    const ALL = await User.findAll()
    console.log(
      'OK getAll USER: ',
      ALL.map((el:any) => el.dataValues),
    )
    return res.status(200).json(ALL)
  } catch (error) {
    console.log('ERROR in getAll ' + 'USER:', error)
    return res.status(500).json(error)
  }
}


export async function getOne(req:Request, res:Response, next:NextFunction) {
  console.log('getOne: [GET] /users/:id')
  try {
    const u = await User.findByPk(req.params.id)
    console.log('OK getOne USER: ', u.dataValues)
    return res.status(200).json(u)
  } catch (error) {
    console.log('ERROR in getOne ' + 'USER:', error)
    return res.status(500).json(error)
  }
}


export async function updateOne(req:Request, res:Response, next:NextFunction) {
  console.log('updateOne: [PUT] /users/:id')
  try {
    const USER_MODEL = {
      username: req.body.username,
      email: req.body.email,
      password: req.body.password,
    }

    try {
      const u = await User.update(USER_MODEL, { where: { id: req.params.id } })
      console.log('OK updateOne USER: ', u)
      return res.status(200).json(u)
    } catch (error) {
      console.log('ERROR in updateOne ' + 'USER:', error)
      return res.status(500).json(error)
    }
  } catch (error) {
    return res.status(400).json('Bad Request')
  }
}


export async function deleteOne (req:Request, res:Response, next:NextFunction) {
  console.log('[DELETE] /users/:id')
  try {
    const u = await User.destroy({ where: { id: req.params.id } })
    console.log('OK deleteOne USER: ')
    return res.status(200).json(u)
  } catch (error) {
    console.log('ERROR in deleteOne ' + 'USER:', error)
    return res.status(500).json(error)
  }
}


function next() {
  throw new Error("Function not implemented.");
}
This is a good start. But it’s not enough.
We’ve created the five functions. Next, we have to connect these controllers to some URL paths (called routes in REST API parlance) and then import them. To do this, we need to edit the server.ts file.
Let's add these three lines to the import section:
import { getAll, getOne, createOne, updateOne, deleteOne } from './local-user';
import sequelize from './util/database'; // database and sequelize initializations
import User from './models/users'; // REQUIRED even if your IDE says it’s not used!
Then, add the new routes:
app.get('/users', parser, getAll);
app.get('/users/:id', parser, getOne);
app.post('/users', parser, createOne);
app.put('/users/:id', parser, updateOne);
app.delete('/users/:id', parser, deleteOne);
Let’s comment these 2 lines:
app.listen(PORT, HOST);
console.log(`Running on http://${HOST}:${PORT}`);
Finally, we have to synchronize sequelize before launching our application to create the user table.
const start = async () => {
  try {
    await sequelize.sync(
      { force: false } // Reset db every time
    );

    app.listen(PORT, HOST);
    console.log(`Running on http://${HOST}:${PORT}`);
  } catch (error) {
    console.log(error);
  }
};

start();
Docker Compose
Do you remember in the previous article when we had to write those long commands?
What if I told you that can be avoided by writing the commands in a more declarative way to a file? That would be great, right?
Well, Dockerompose does exactly that. Let's see a practical example now.
First of all, let's create a docker-compose.yml file:
version: '3.8'

services:
  node_backend:
    container_name: node_backend
    image: node-test:1.0.0
    build:
      context: .
    ports:
      - '8080:80'
    environment:
    - PGUSER=francesco
    - PGPASSWORD=12345
    - PGDATABASE=defaultdb
    - PGHOST=db # NAME OF THE SERVICE
    depends_on:
      - db
  db:
    container_name: db
    image: 'postgres:12'
    ports:
      - '5432:5432'
    environment:
      - POSTGRES_USER=francesco
      - POSTGRES_PASSWORD=12345
      - POSTGRES_DB=defaultdb
    volumes:
      - pgdata1:/var/lib/postgresql/data

volumes:
  pgdata1: {}
Let’s examine this line by line.
The first line is the Docker Compose version and must be specified.
Then there are services, a synonym for containers. We will have two containe - oops, sorry, services:
node_backenddb
The first will, not surprisingly, contain our Node.js backend application, and we can also specify:
container_name: Used to define the name of the container when we run our backend application.image: The image to use or build (if not present).build: Defines some parameters to build the image directly, without using the docker build command! This is very convenient as we will see shortly.ports: to define the ports to be published, in this case, 8080 externally and 80 internallyenvironment: Here we can define some environment variables - the configuration for our application. We define four variables that are used in thedatabase.tsfile inside theutilfolder in our application.depends_on: Manages dependencies between containers. In this case, we want the container running our database to start before our application container. (The database service is simply called db because I’m lazy.)
Let me explain the db container definition line by line as well.
container_name: the name of the container. This is very important! Do you see the name of the PGHOST variable? This is how the connection between the two containers takes place!image: ‘postgres: 12’: Here we don’t use our custom image (although we could) but simply the prebuilt image for \Postgres on Docker Hub. That means we do not specify a build entry here.ports: We use the standard one for Postgres, 5432, for both external and internal ports.environment: The environment variables here are those suggested by the official Postgres documentation: user, password, and database.volume: pgdata1. This is for persistence. To get an introduction to volumes, you can see our previous article. Here, we are using thepgdata1volume, which is defined below in thevolumessection.
docker compose up
You might think that, to run all the containers, we should do something like docker run.But there’s a better way:
docker compose up -d db
To check if the db is up and running, you can type the following (replace the parameter to -U with your username):
docker exec -it db psql -U francesco defaultdb
but you can type
exit
To exit the Postgres container, to run our Node.js Applcation
and to run our node service, we can type:
docker compose up -d node_backend

Postman
Now let's test our endpoints. First of all, let's ensure the application is up and running:
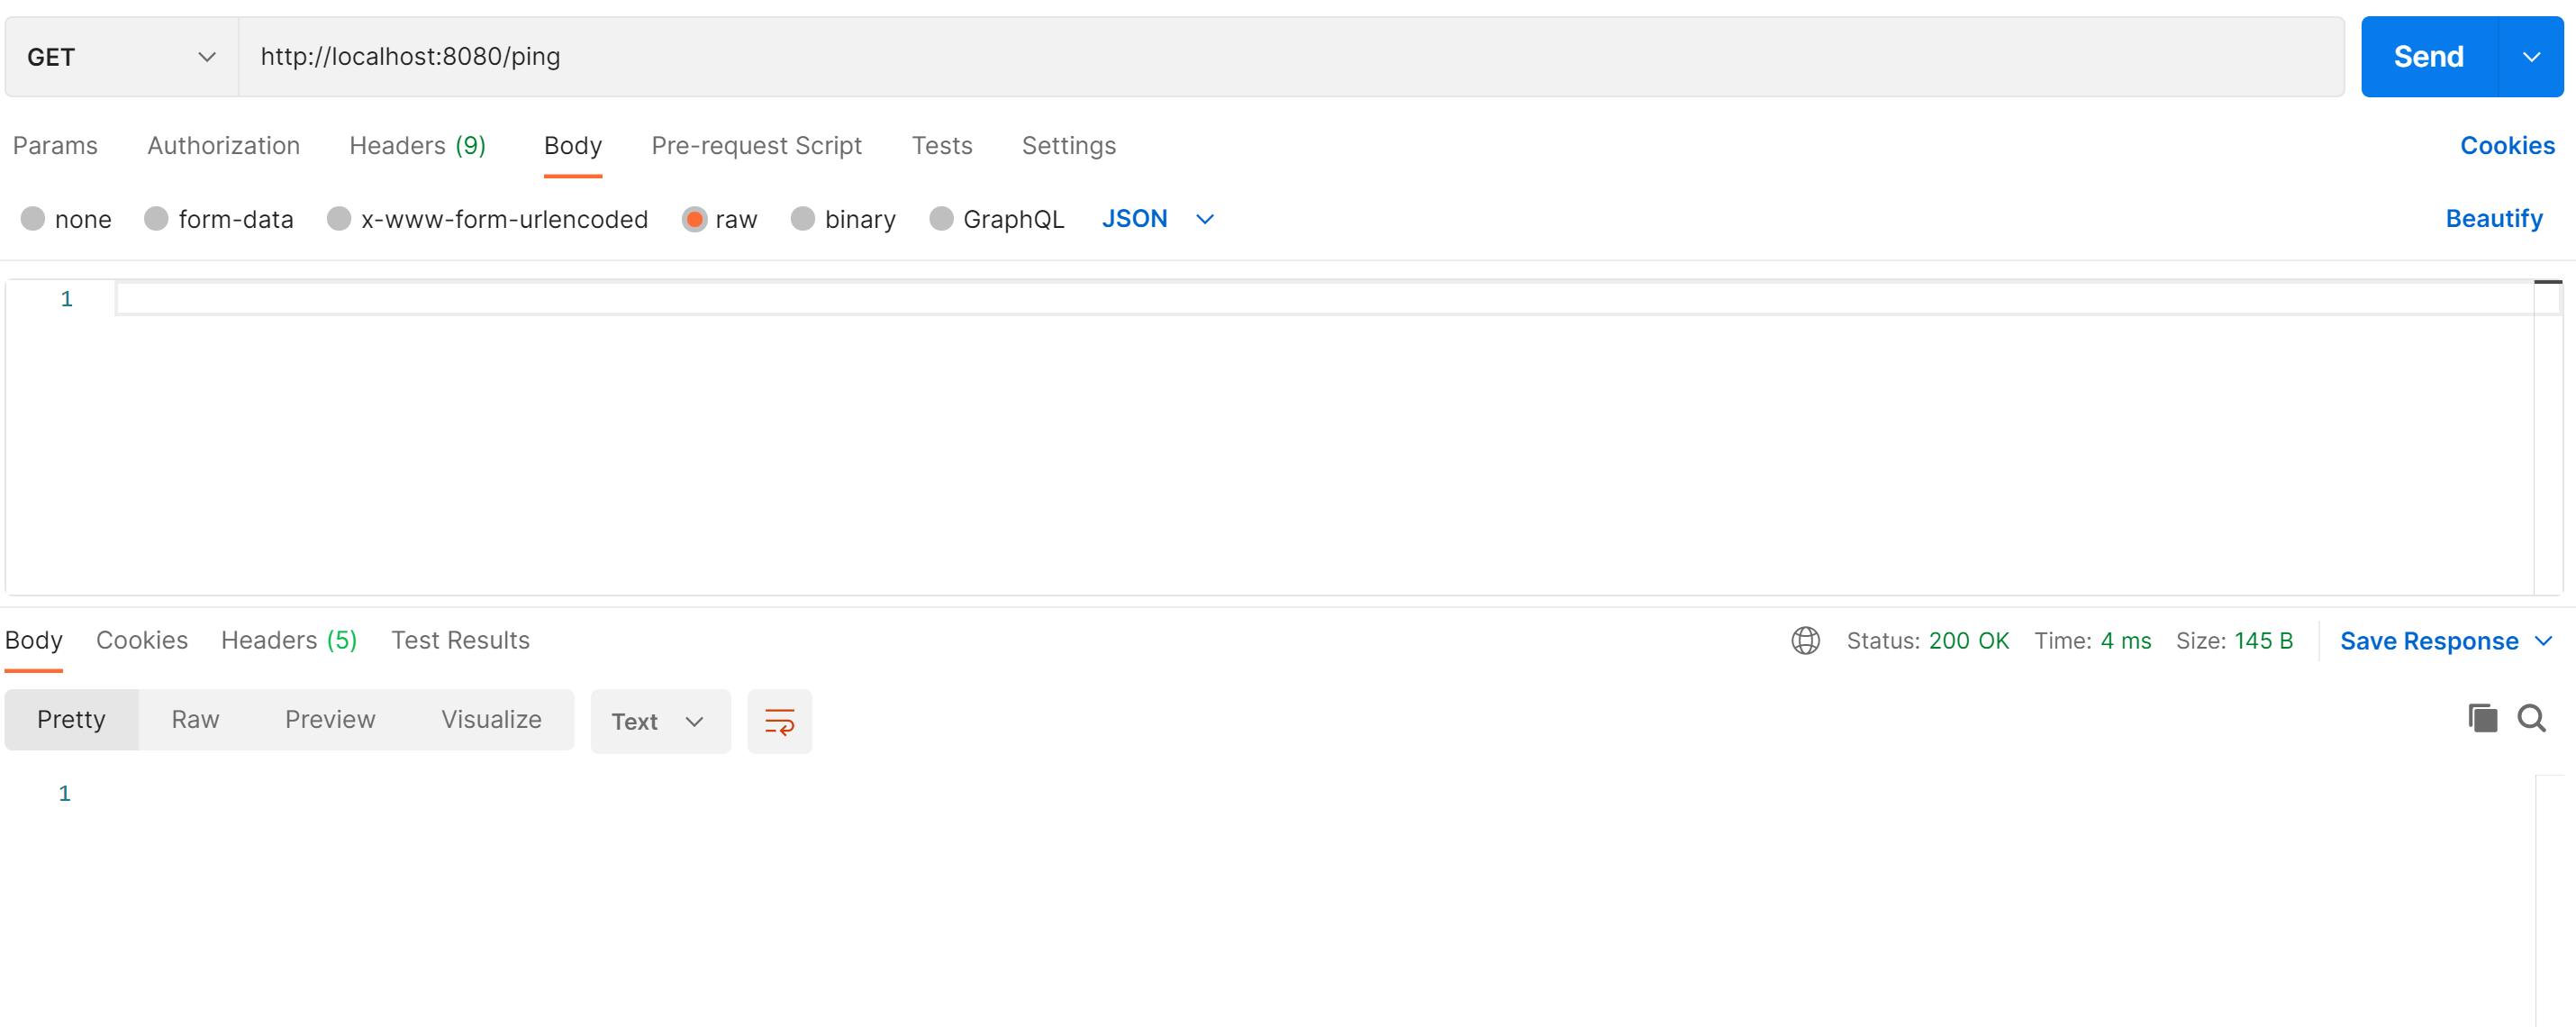
To check all the users, make a GET request:
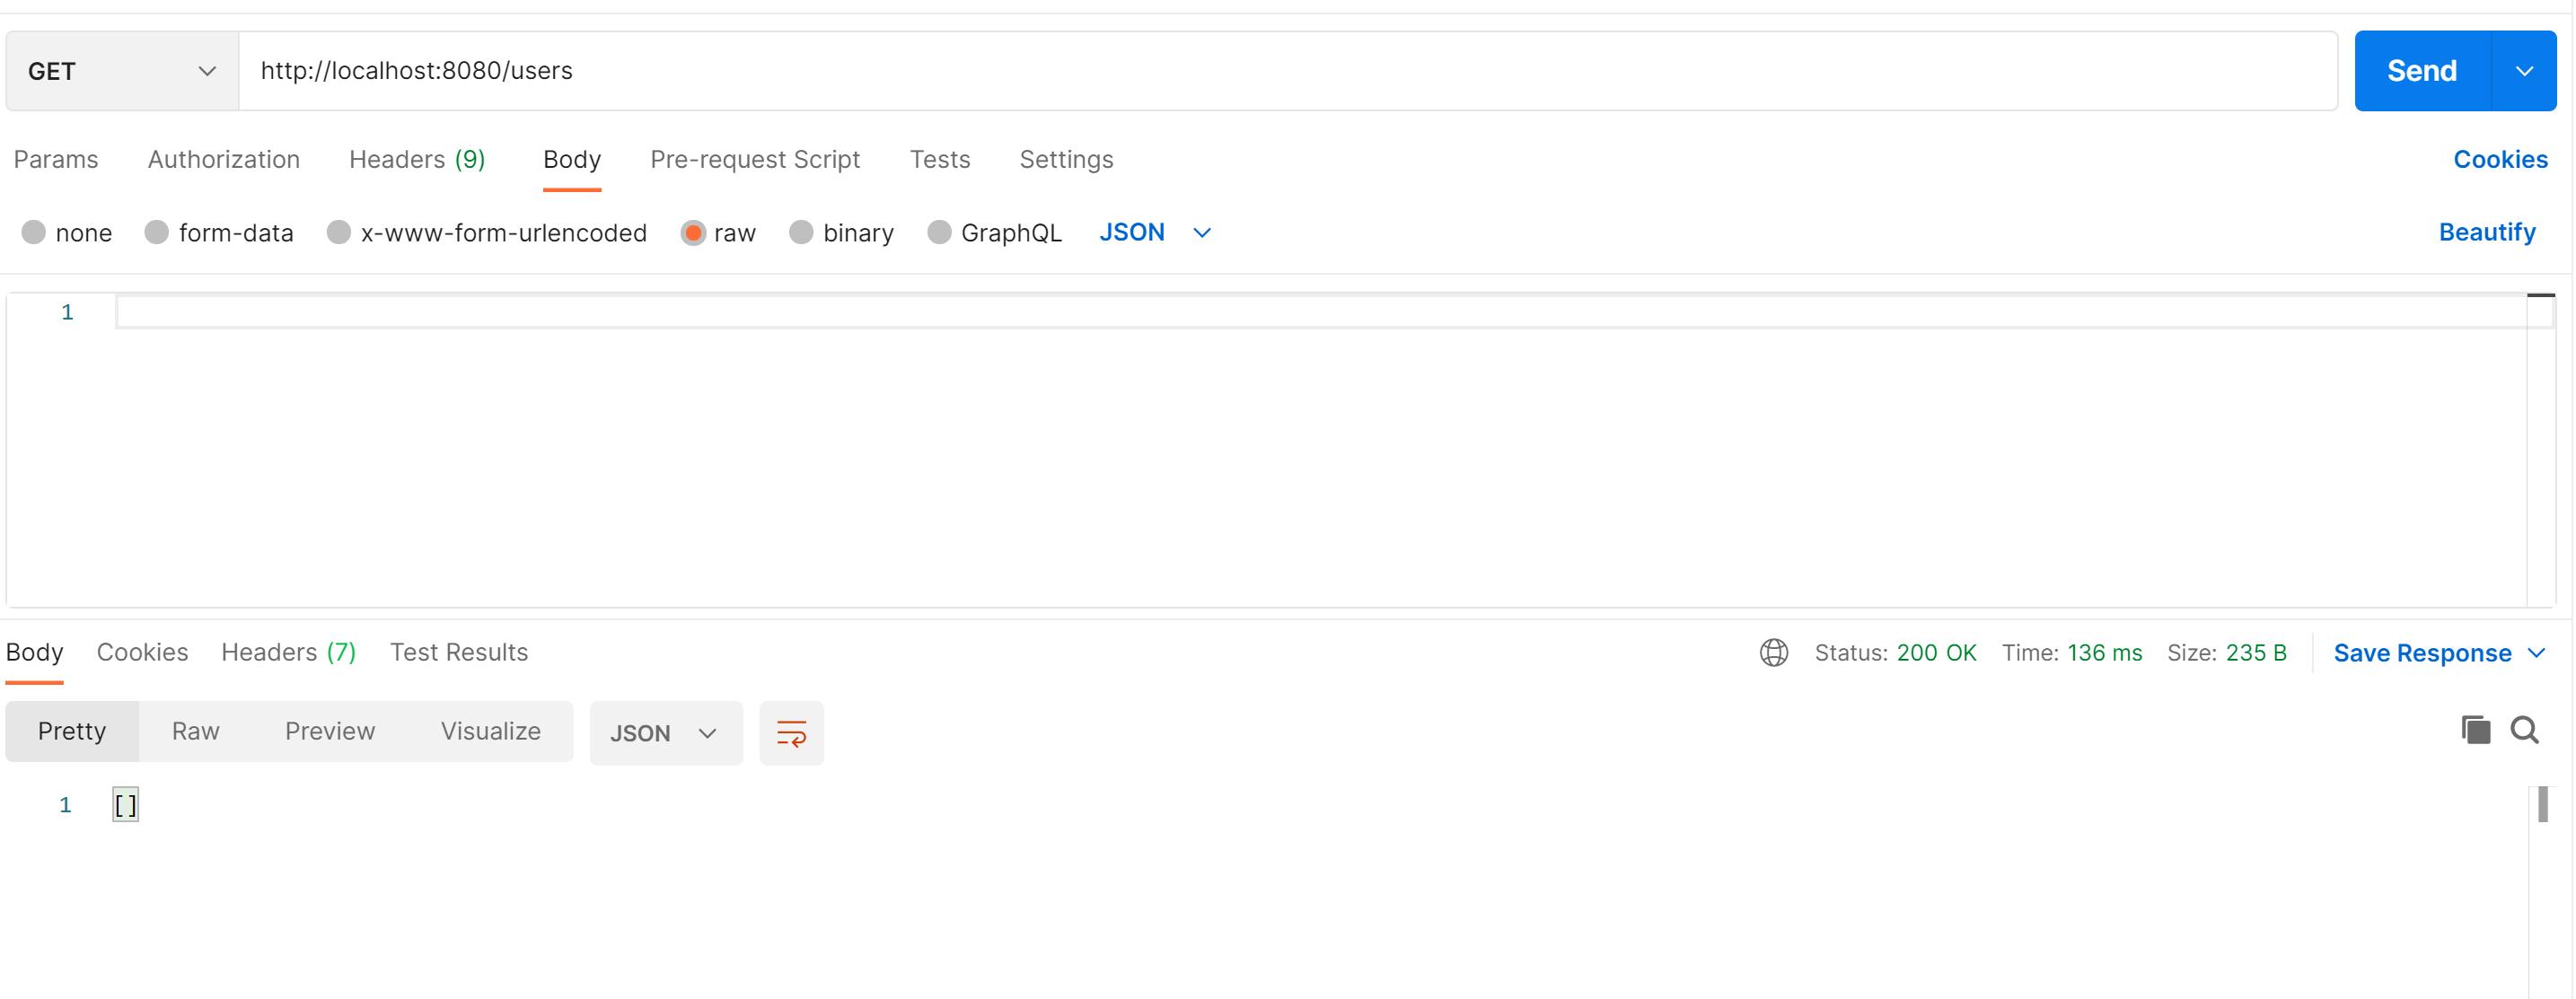
And of course, it's empty now. So let's create a new user:
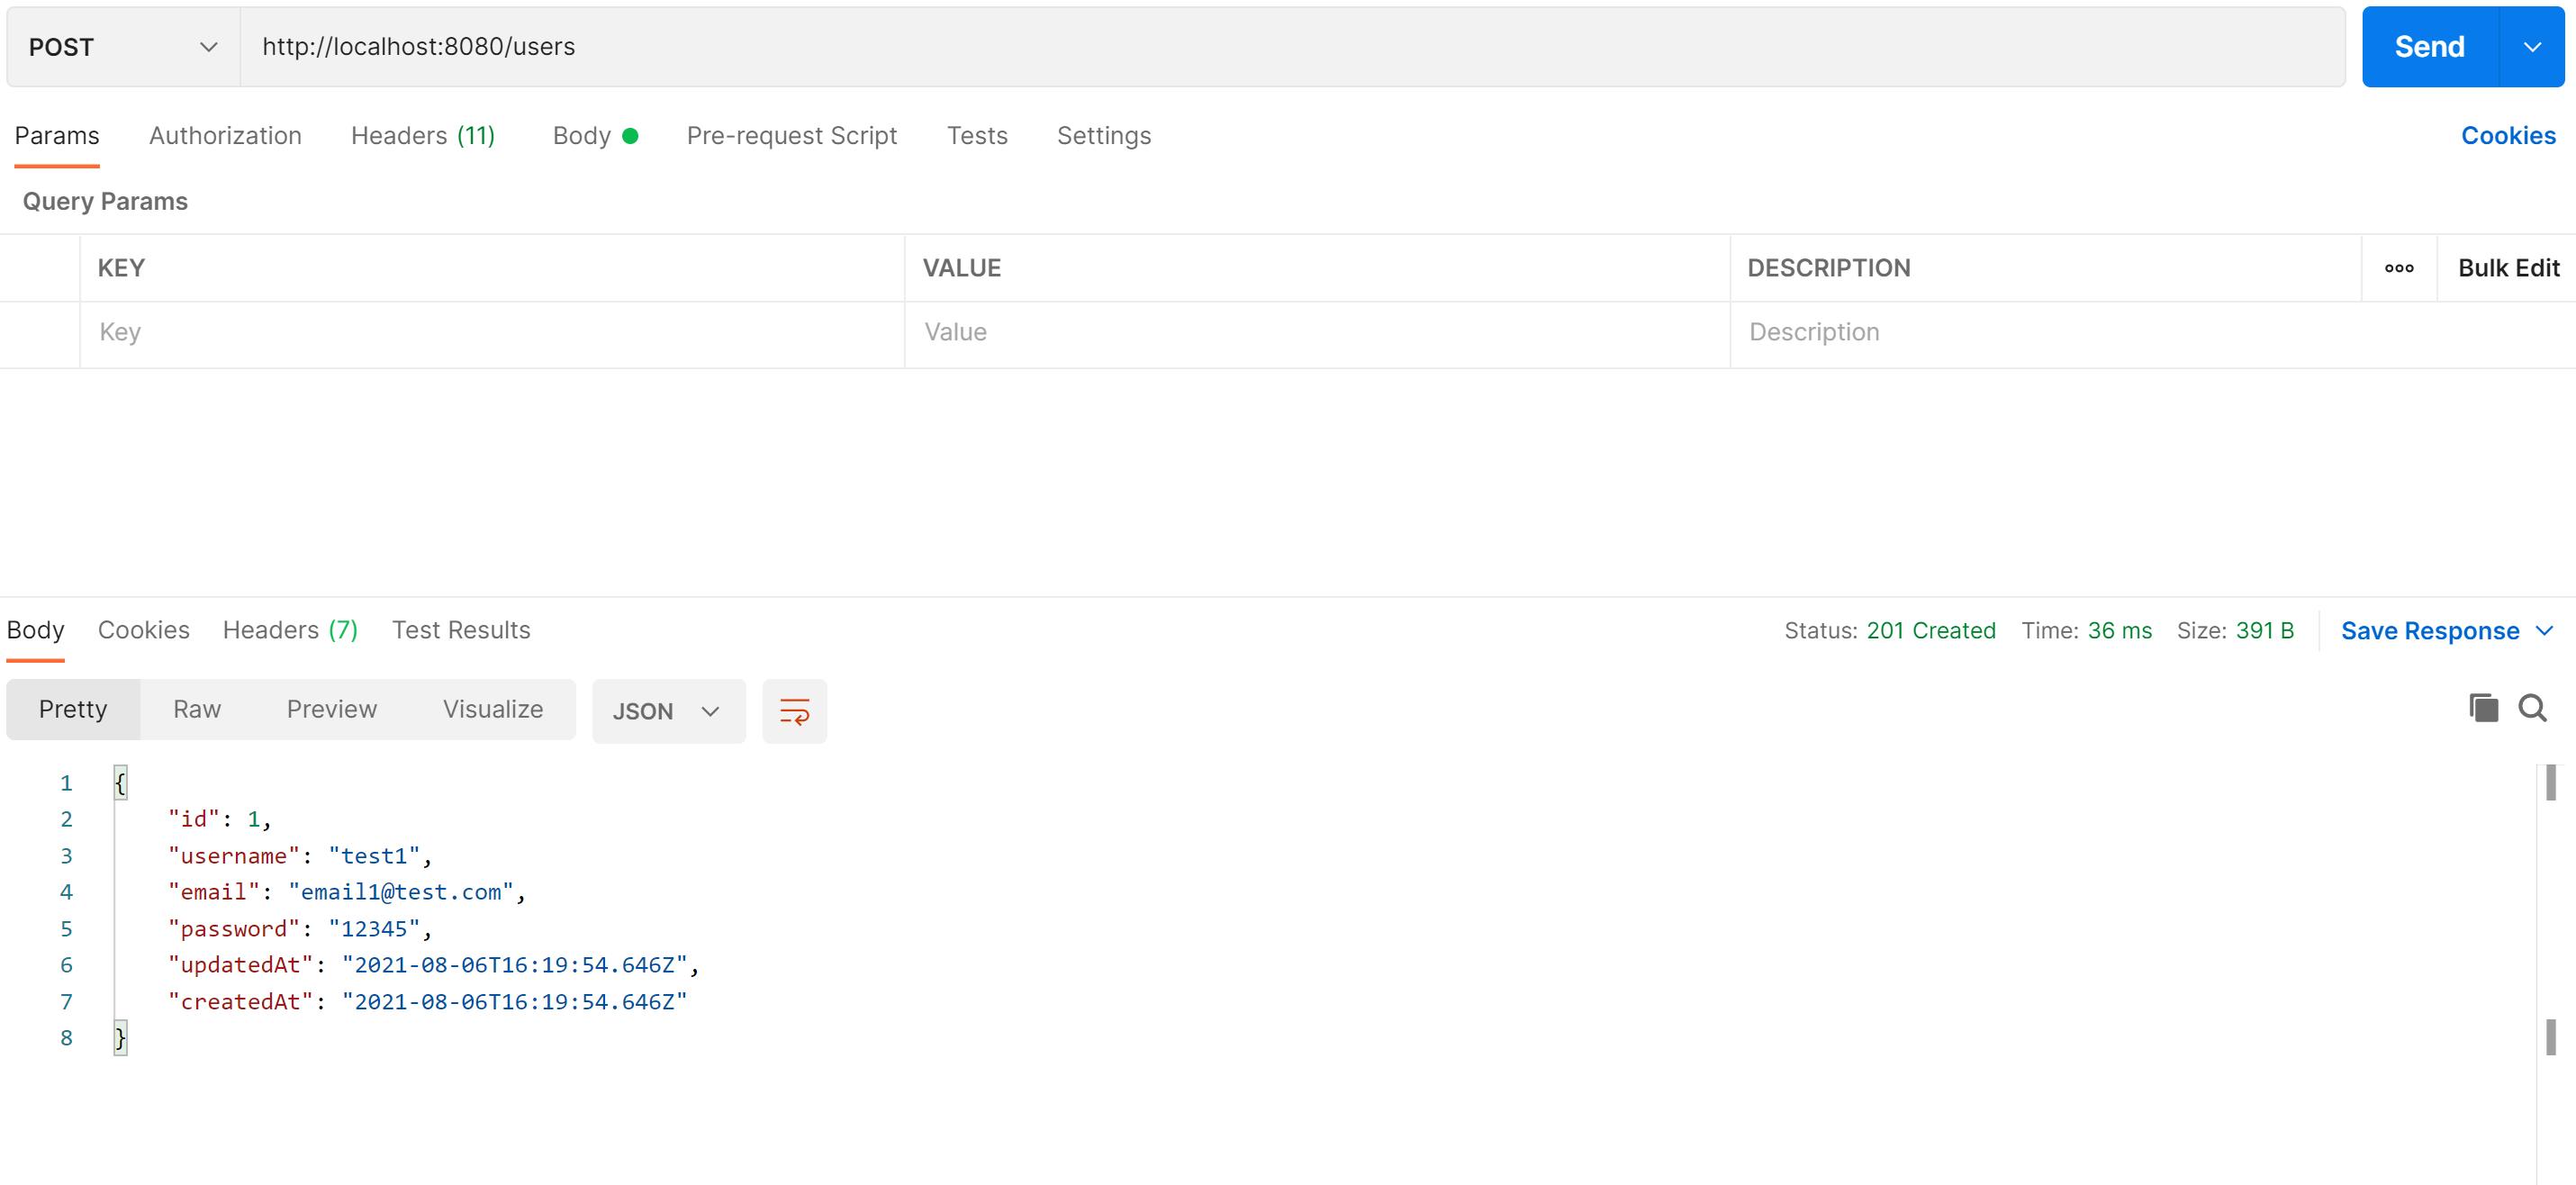
Let's try to get all the users again:
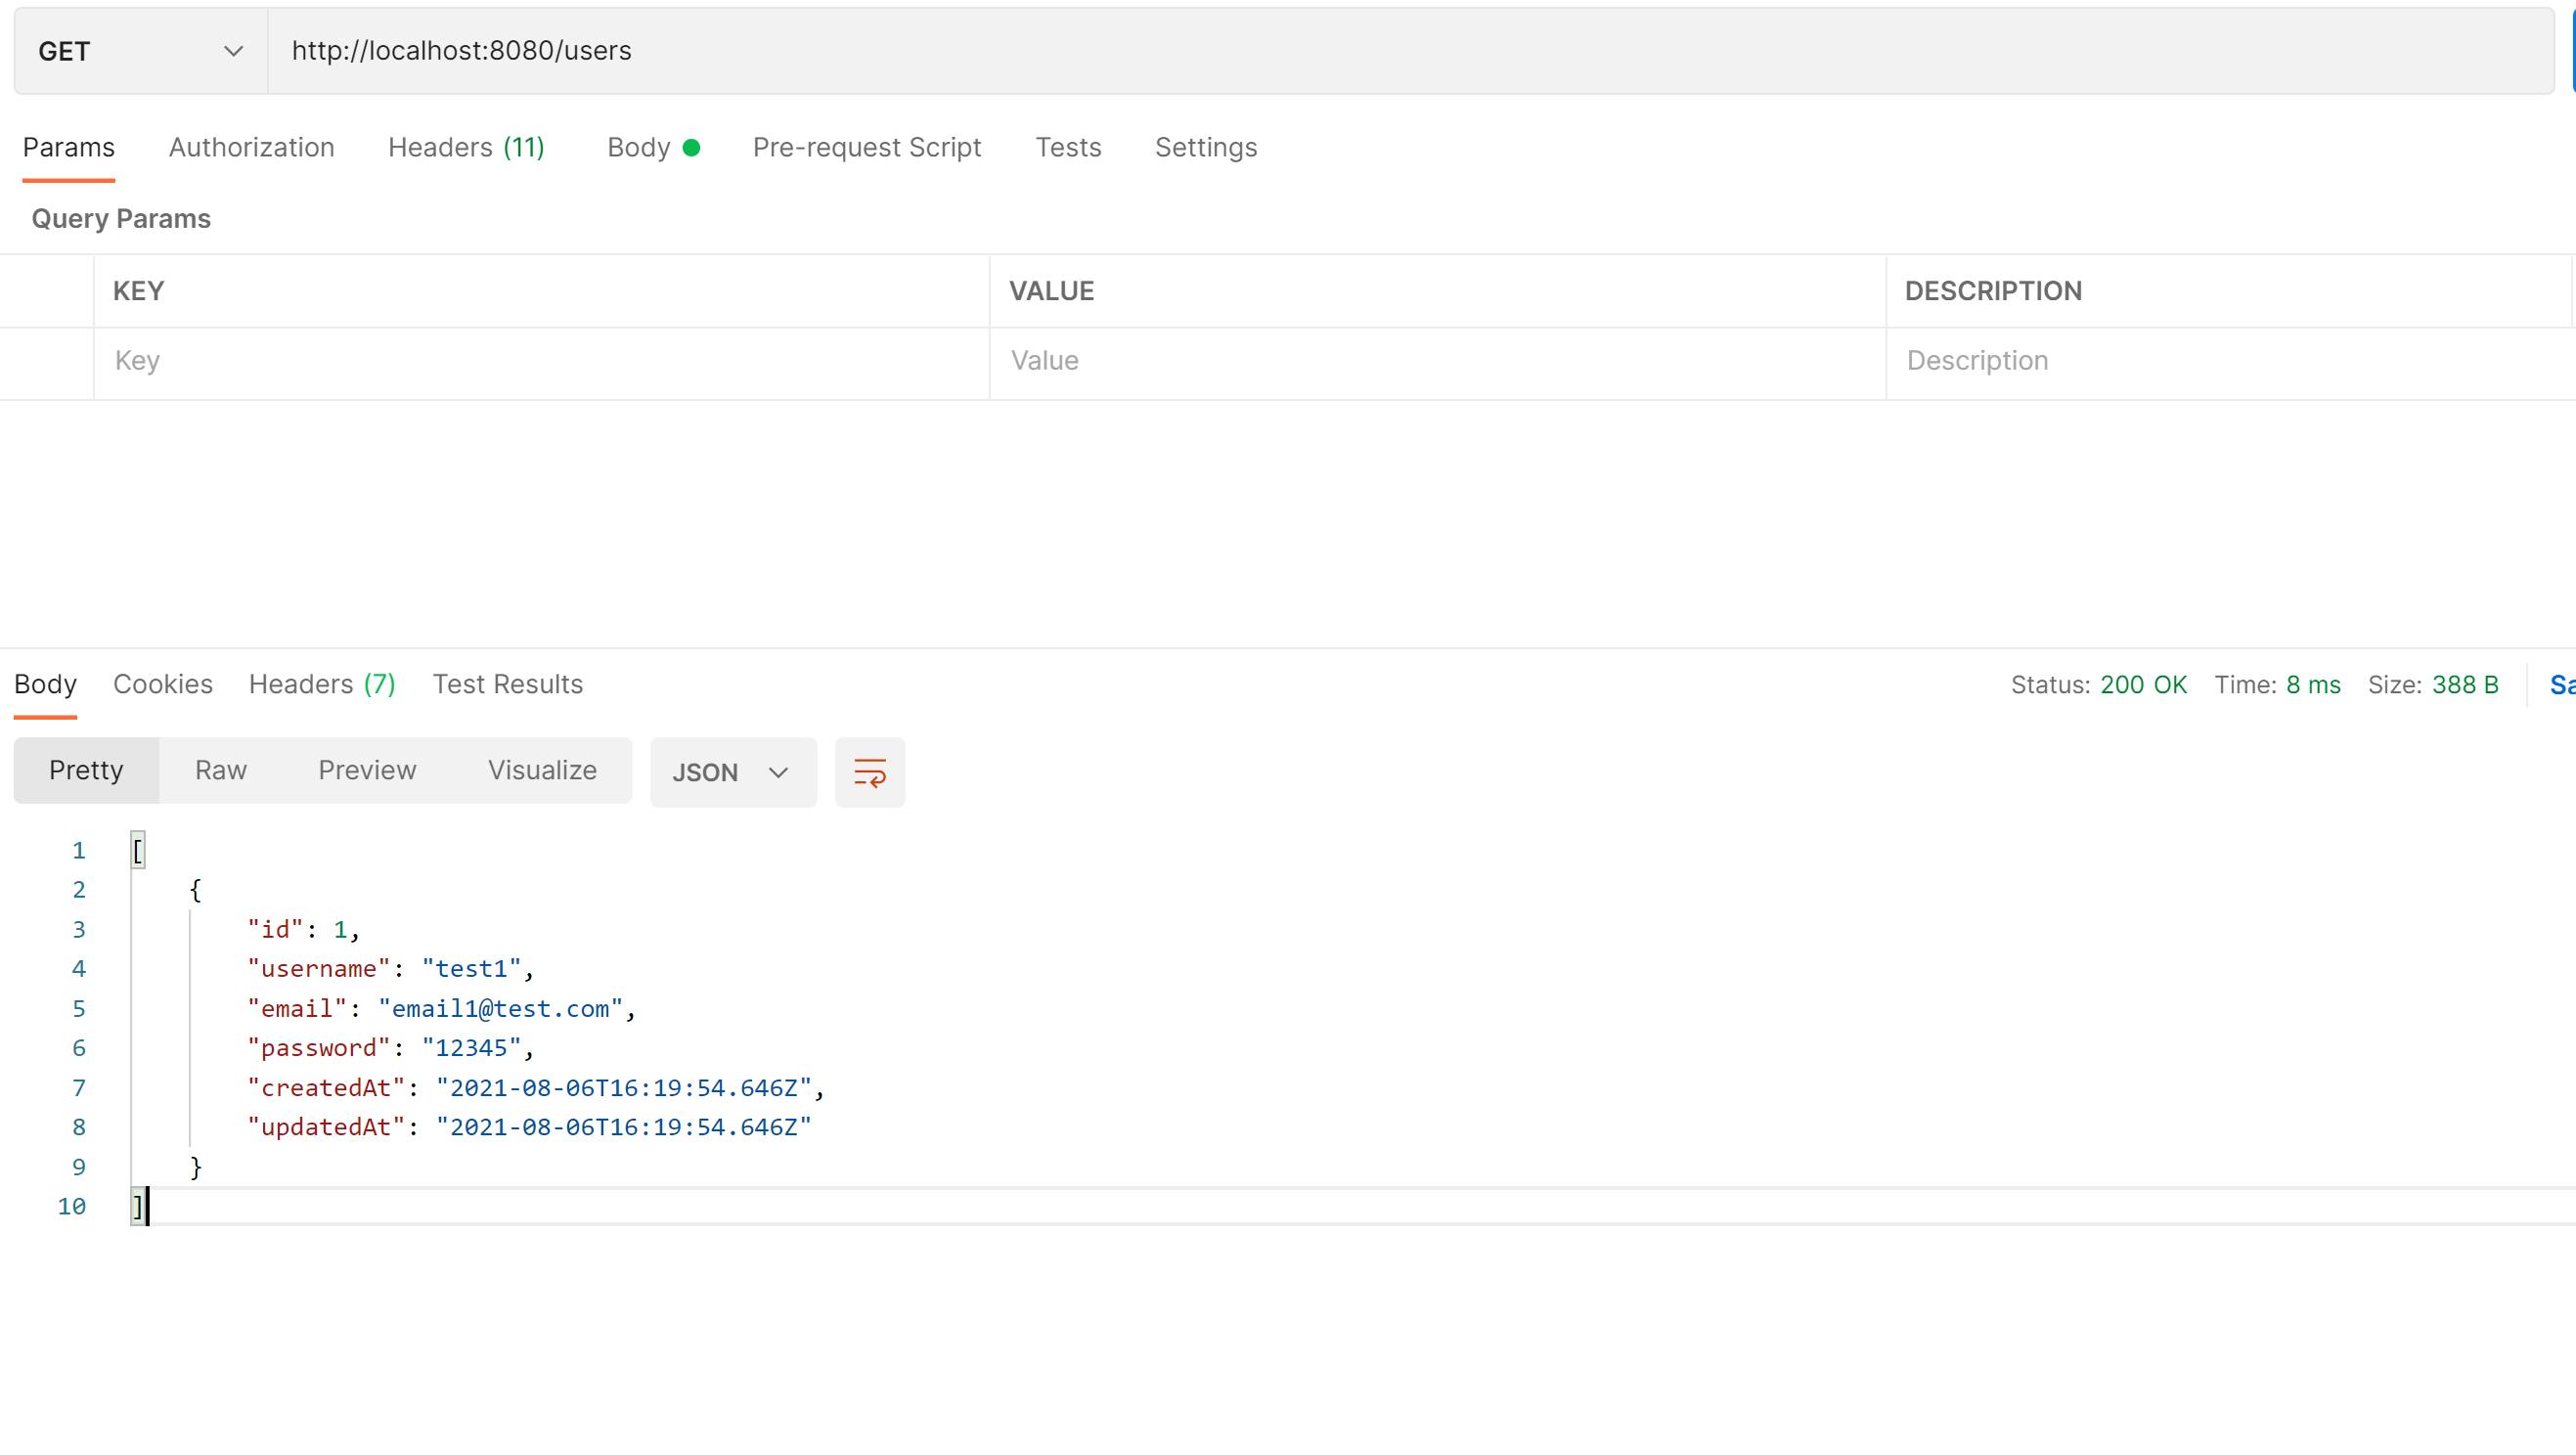
As you can see , now we have an array of one element.
Let's create a couple more:
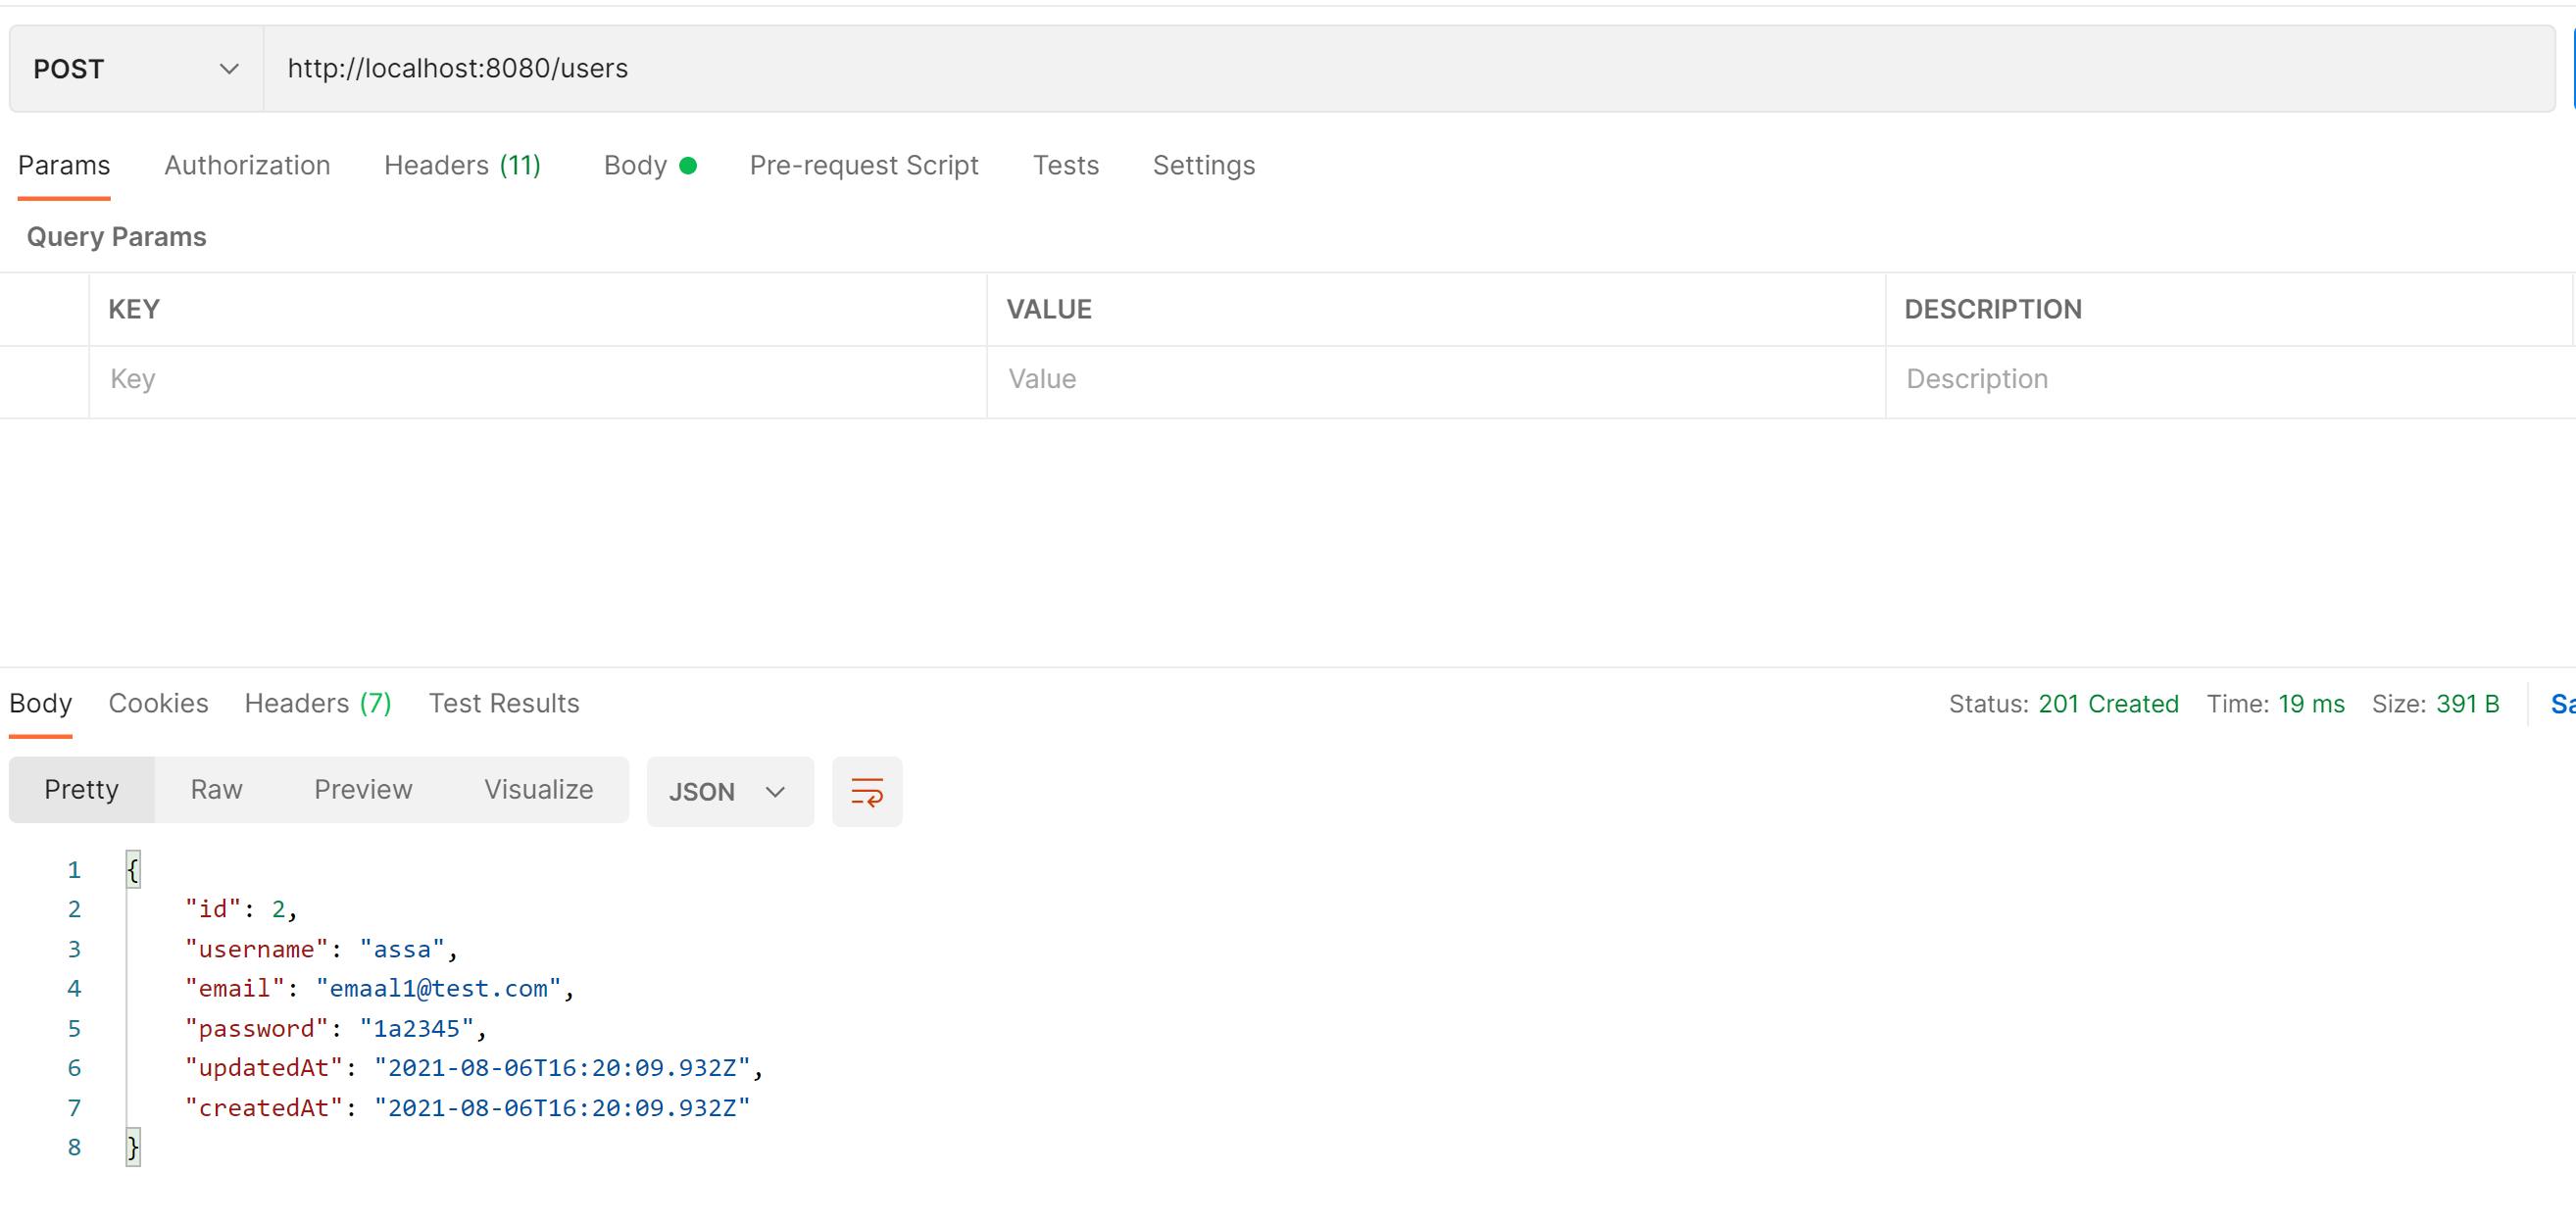
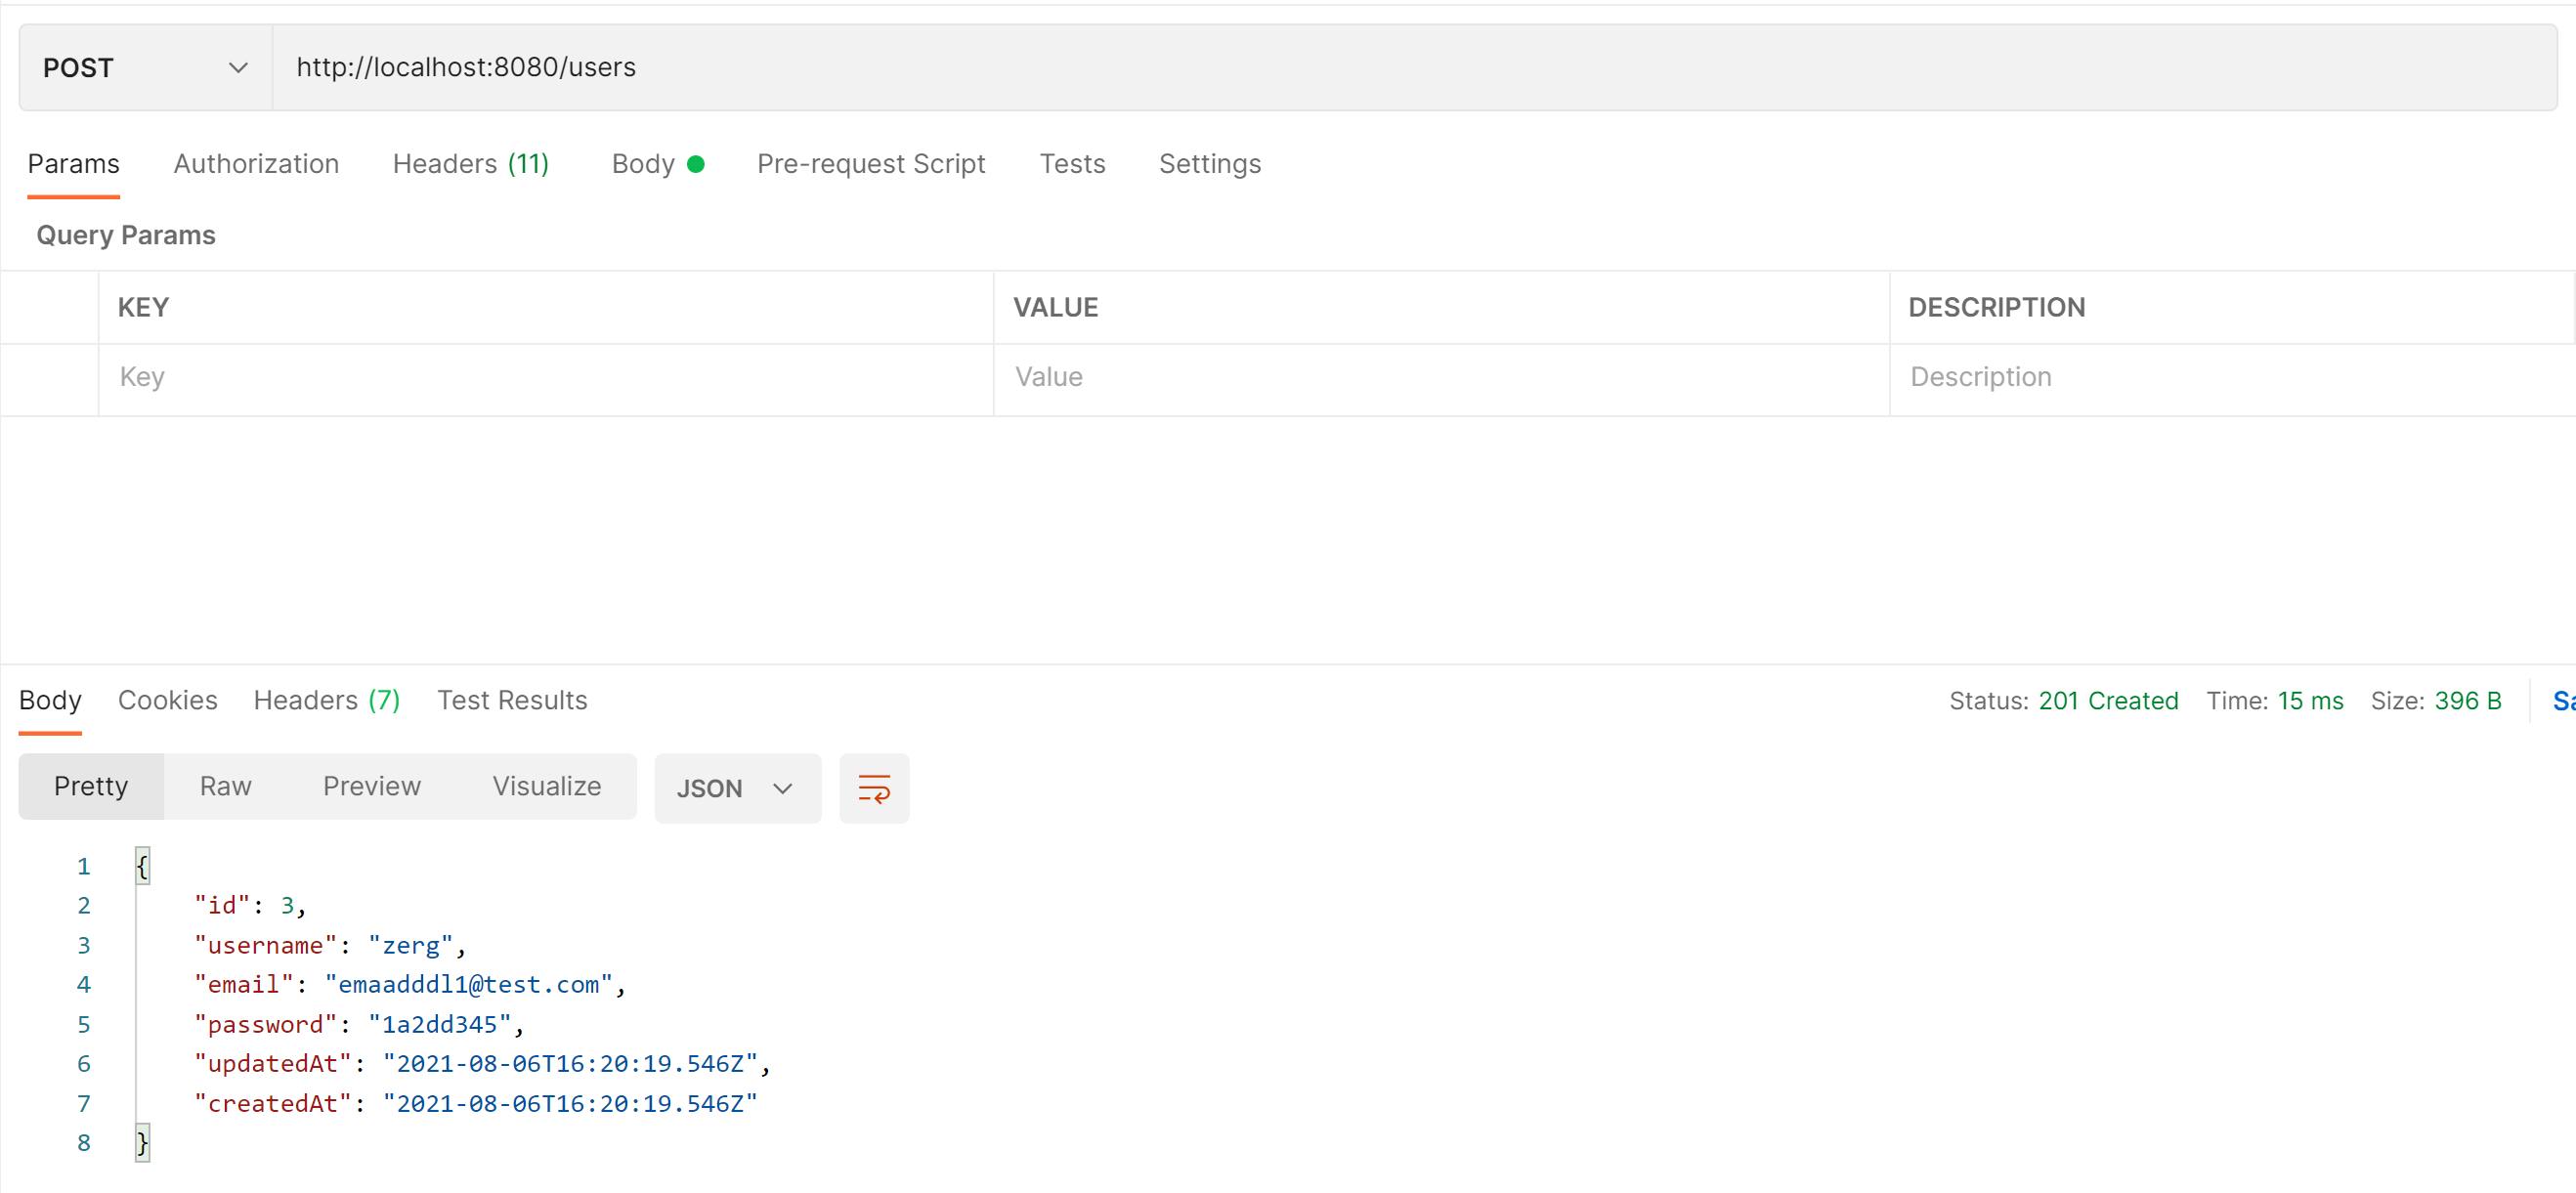
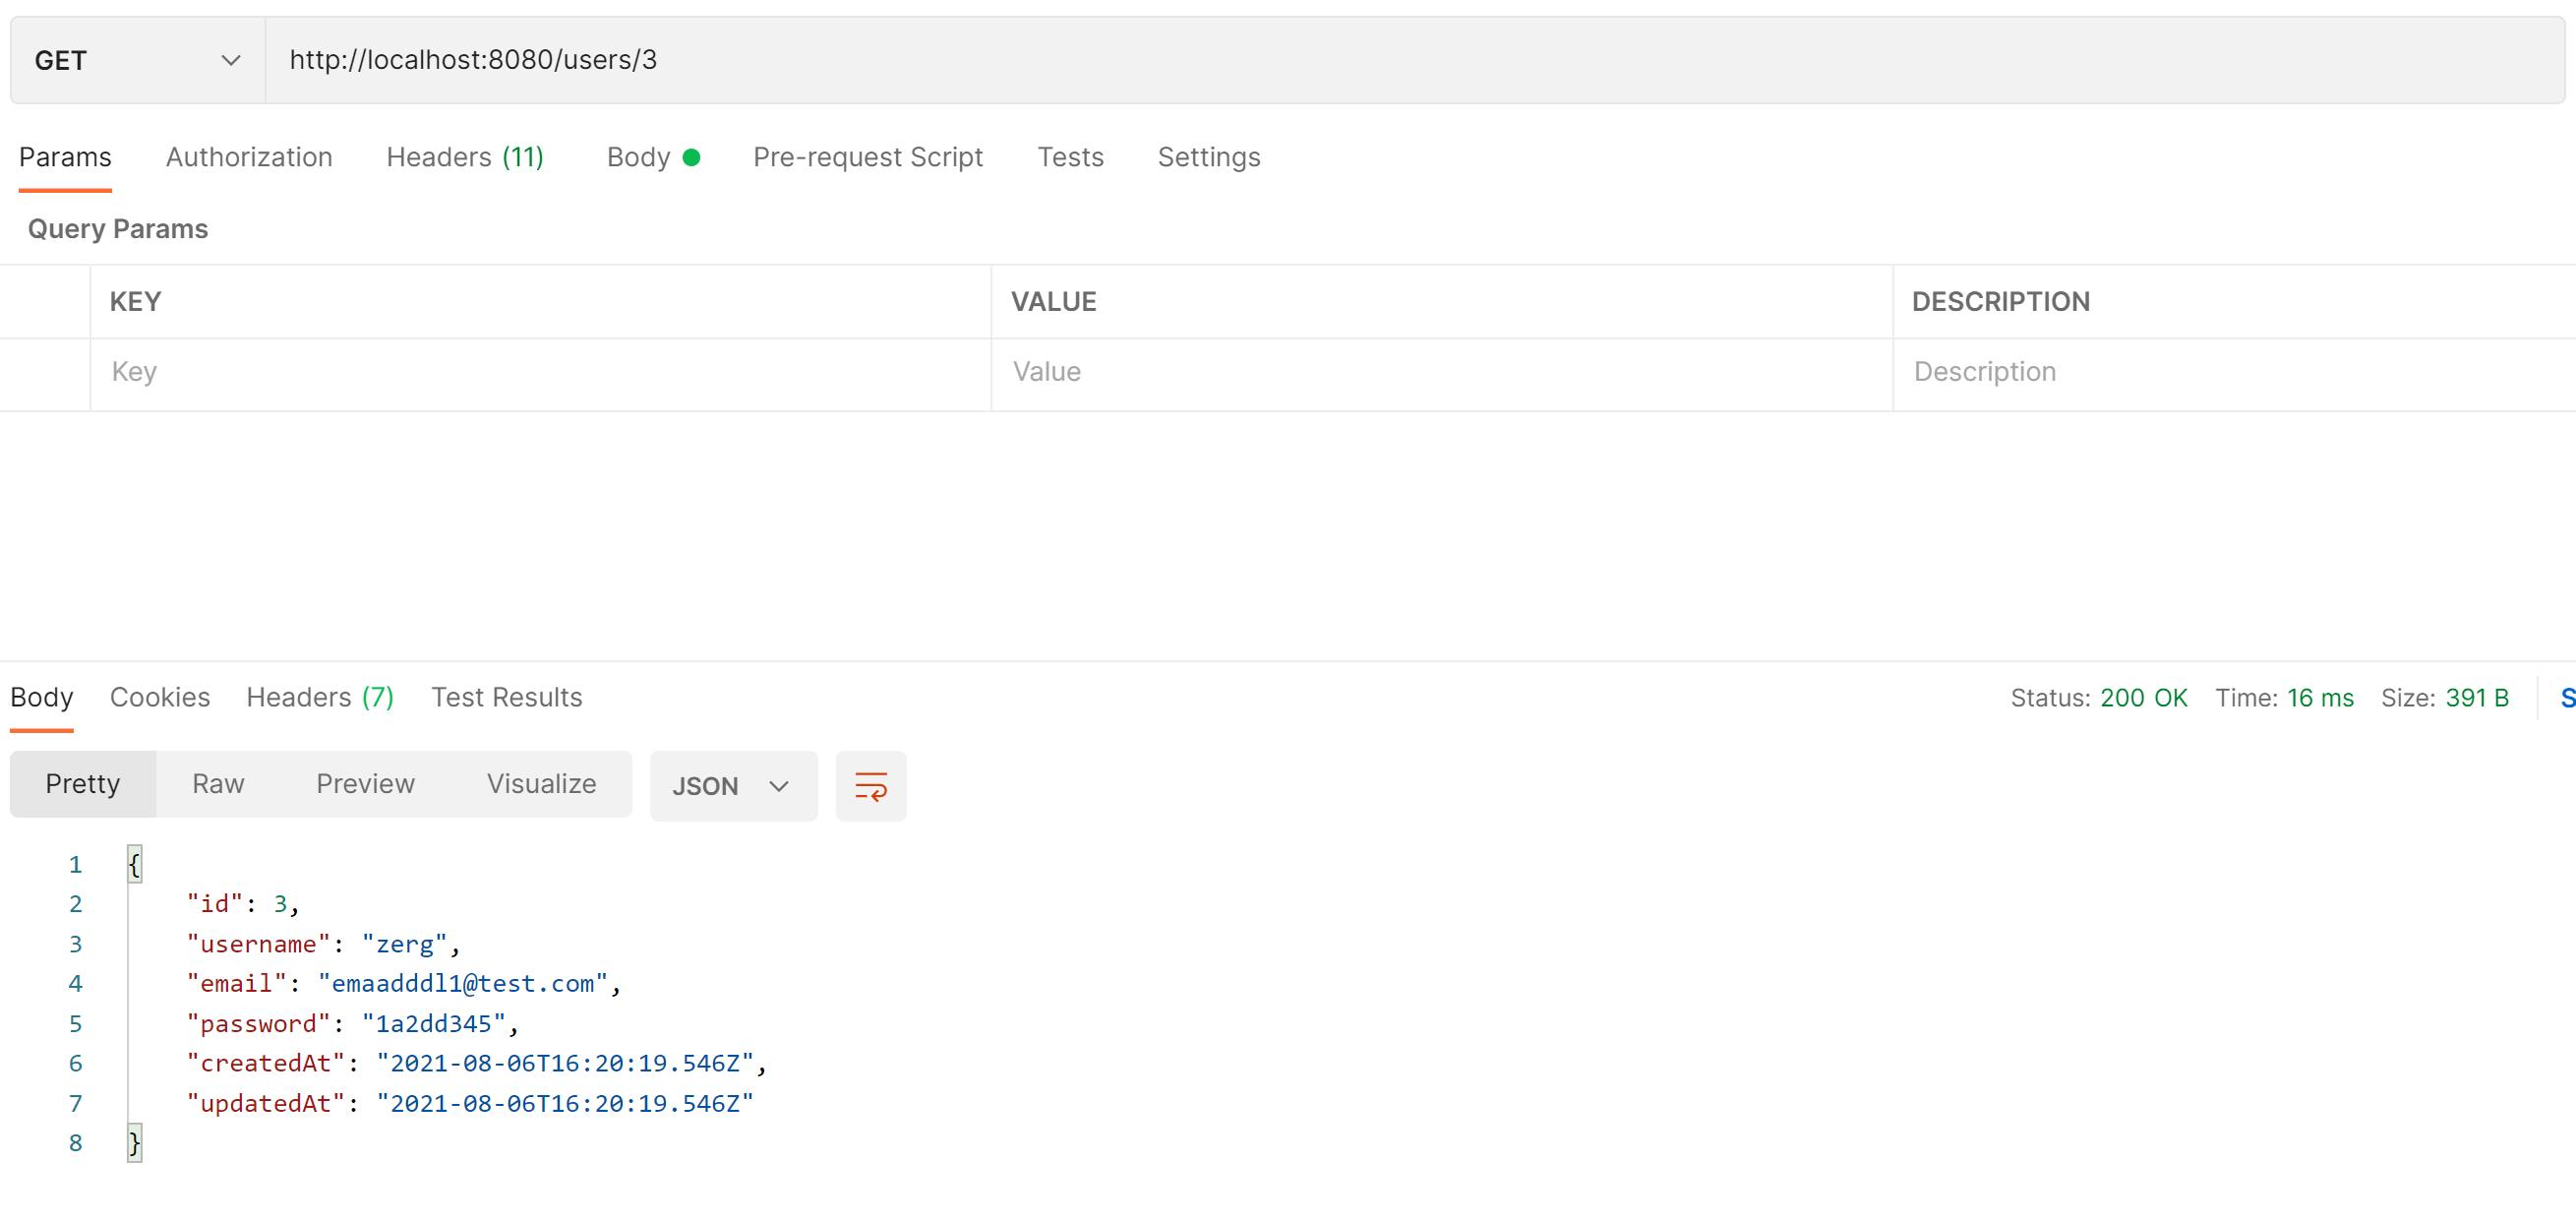
To get a single user, we can add the id of the user at the end of the URL:
To update an existing user, we can make a PUT request, adding the id of the user at the end of the URL and attaching a request bod:
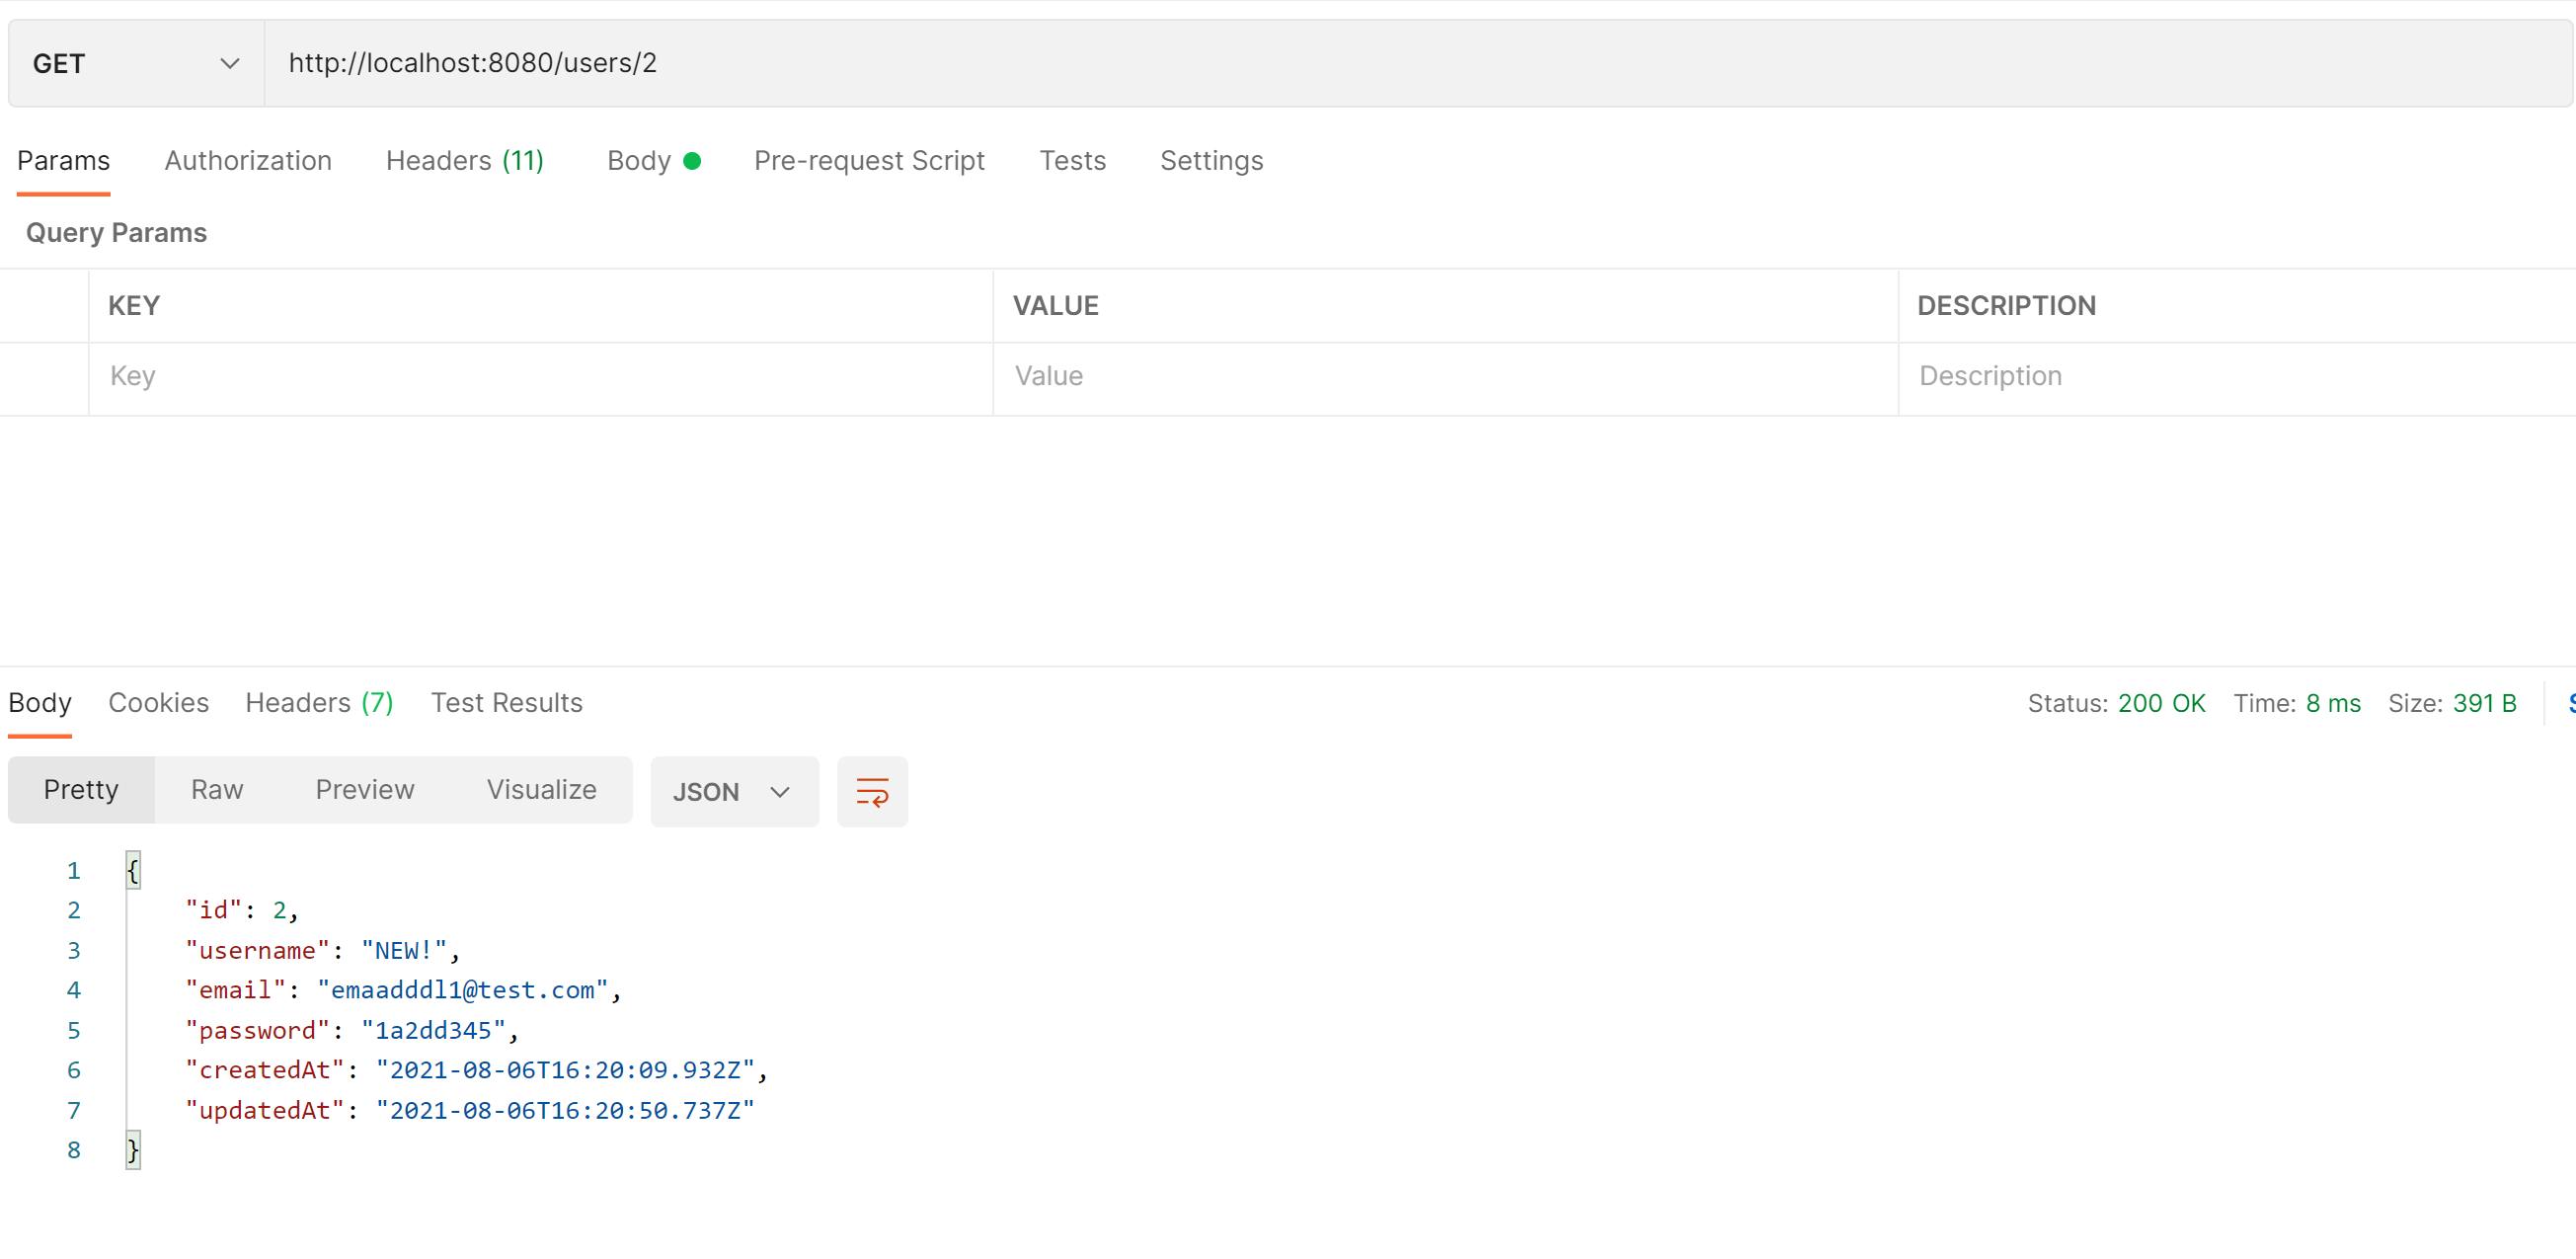
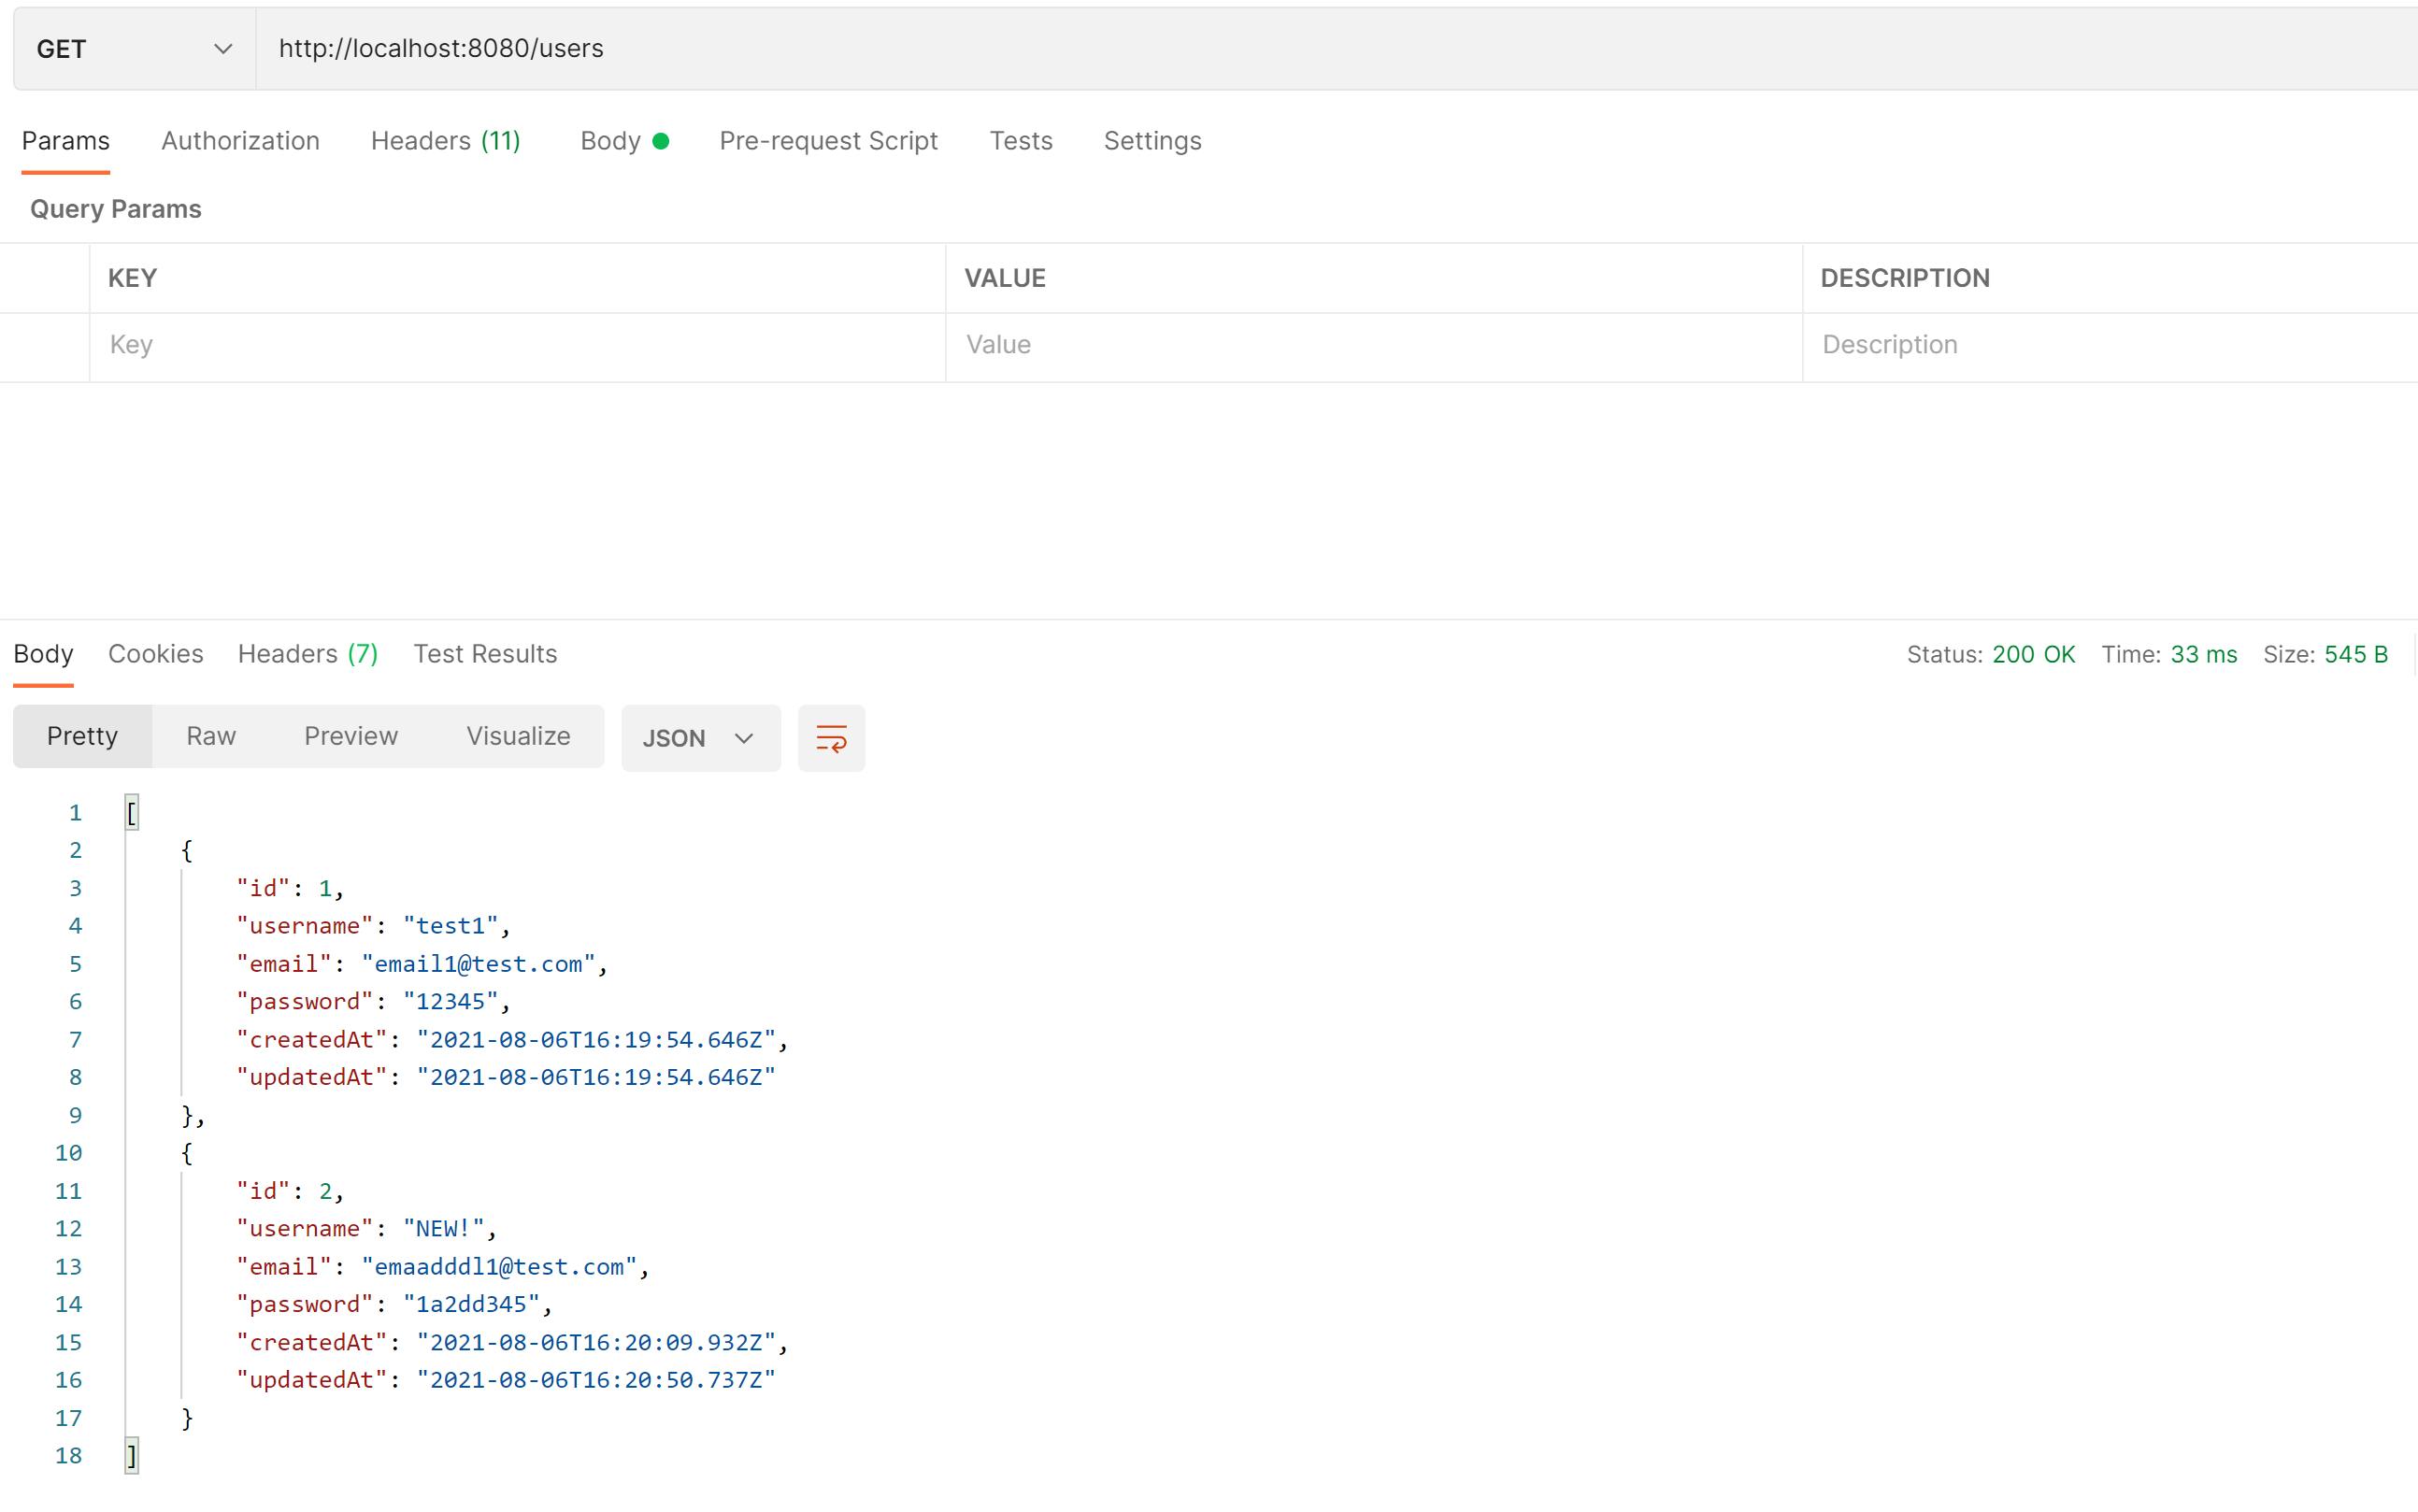
Here you can see the updated user:
To delete a user, we can make a DELETE request, adding the id of the user. If our call returns a 200 response code, that means that the user had been deleted
 Iif we try to get all the users again, we can see that the one with id 3 is no longer there:
Now that you're familiar with Docker Compose and an Express App the next step is deploying. Check out the TinyStacks docs on deploying app to AWS. You stay focused on your apps, we'll take care of configuring AWS for security, networking, auto-scaling, pipelines, and stages for your team. If you have any comments or questions, please write them below!
Video Version: youtu.be/qczbRQtmCDo

